

The Shellal Mosaic
First World War Australian Capital Territory

The Shellal Mosaic
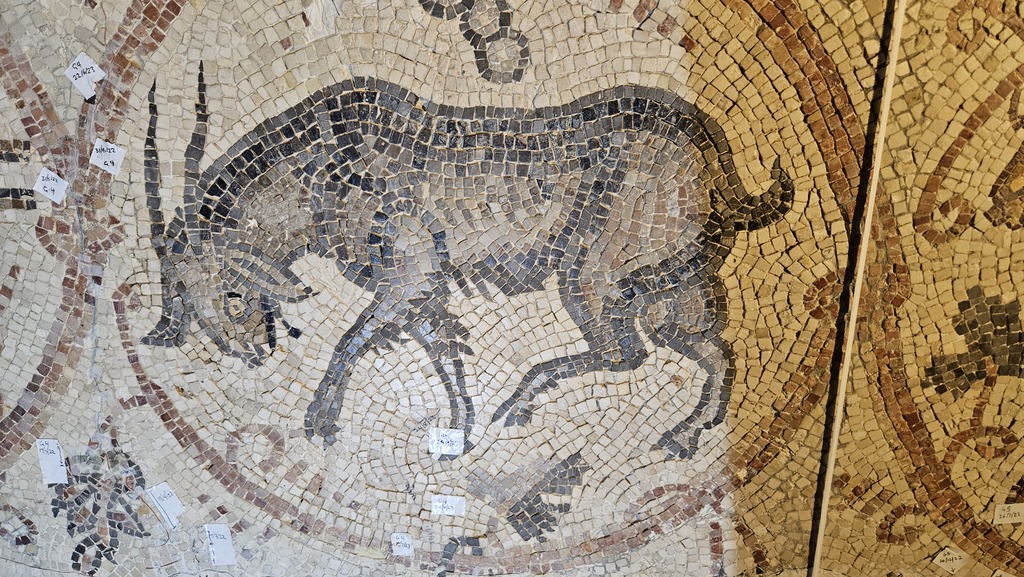
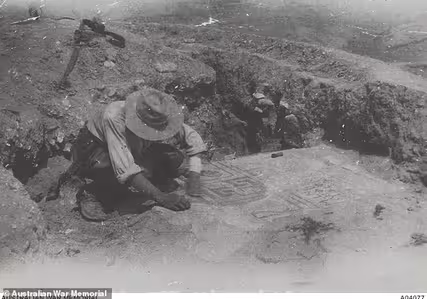
In April 1917, a group of Australian signallers under Corporal Ernest Lovell-Shore came across a Turkish Machine Gun position on a small hill overlooking a road crossing in the Wadi Ghuzze near the town of Shellal. When Lovell-Shore and his sigs entered the Ottoman positions to establish a Helio Station there, they discovered that the Turkish forces had accidently uncovered an ancient looking mosaic, unfortunately causing considering damage to it in the excavation of defensive positions on the site.
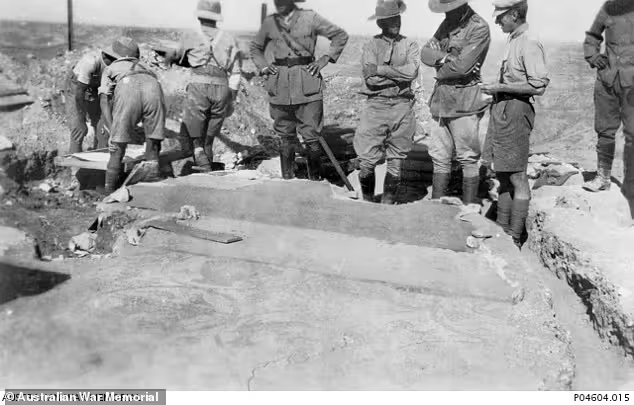
Created between AD 561-562 under Eastern Roman Emperor Justinian. After the dust of battle eased, word reached the Senior Church of England Chaplain to the Australian Forces Reverend William Maitland Woods, he himself an amateur archaeologist and arrived fourteen days later to oversee the excavation of the whole site with the approval from Commander of the ANZAC Mounted Division, General Harry Chauvel. However, between its discovery and Woods arrival, it is claimed that members of the Mounted Division, souvenired pieces of the Mosaic. Woods put a stop to it but those souvenired pieces have bene lost to history. With the assistance from volunteers of the Anzac Field Squadron, a six foot excavation was undertaken and the whole mosaic was uncovered after another fourteen days in intense heat and battle when a German aeroplane crew took interest in the excavation.
Once it was fully exposed, photographs were taken and colour drawings where made before General Chauvel ordered Chaplain Maitland to travel to the Cairo to liaise with the Cairo Museum to source the expertise and equipment to safely remove the mosaic. With the assistance of a new party of ANZAC engineers began the careful task of removing the 8000 tesserae inscription without losing any further tiles.
By 20 June the mosaic had been carefully packed into 60 specially made boxes made by the engineers, and placed in a bath of plaster of paris, clay and straw to protect it. After its excavation, General Chauvel ordered a meeting of ANZAC brigade commanders to determine what should happen to the mosaic, the New Zealand Brigade Commanders agreed that because Australia comprised 2/3rds of the ANZAC Mounted Division that it should be sent to Australia. However it would not be up to Australian forces to decide. It had to be arbitrated at the Allied War Trophies Committee. In November 1917 the War Trophies Committee in London discussed the notion of sending the mosaic to Australia, and requested that it be sent to London for safekeeping.
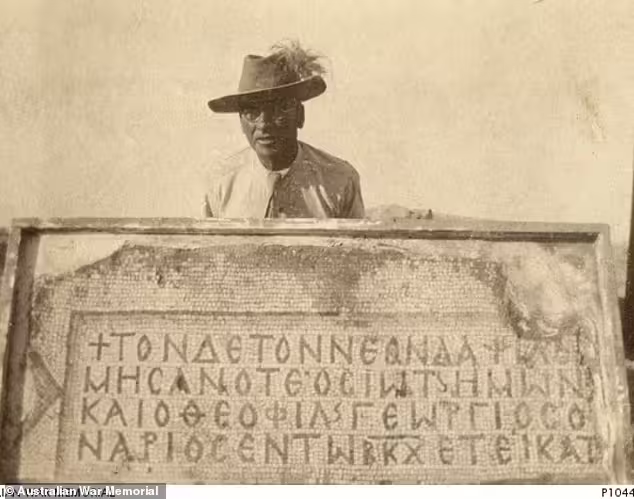
What resulted could be considered a diplomatic incident as Australian authorities in Cairo refused to hand it over, claiming that if they did so they would never see it again, and insisting that its safest location was on a ship bound for Melbourne. London countered with the statement that because it wasn’t captured from the enemy, but an archaeological excavation it can’t technically be considered a war trophy.
On 16 February 1918 Charles Bean aired his frustrations on London’s stalling in the papers, writing how “difficulty had arisen about the disposal of the trophies of the first Australian troops, which, unless swift steps are taken to rectify it, will wreck the whole scheme for the collection of Australian trophies and cause extreme indignation among all Australian troops… A difficulty has already arisen over the very finest trophy captured by the Australians... the ancient mosaic pavement that was carefully preserved and guarded by the Light Horse.”
On June 6 1918 the War Trophies Committee relented and gave permission for the Mosaic to be sent to Australia. On 26 December 1918 it was packed aboard the transport ship Wiltshire and arrived in Melbourne two months later. Briefly on display in Sydney and Melbourne as part of War Trophy exhibits, it was finally installed against the structural wall beneath the Hall of Memory at the Australian War Memorial in the 1940’s. while various attempts were made to try and piece the mosaic back together it was not 100% successful, and paint was used to hide the gaps and missing tesserae. The paint was changed several times to try and blend the mosaic, by using layers of white, beige and lime green paint.