

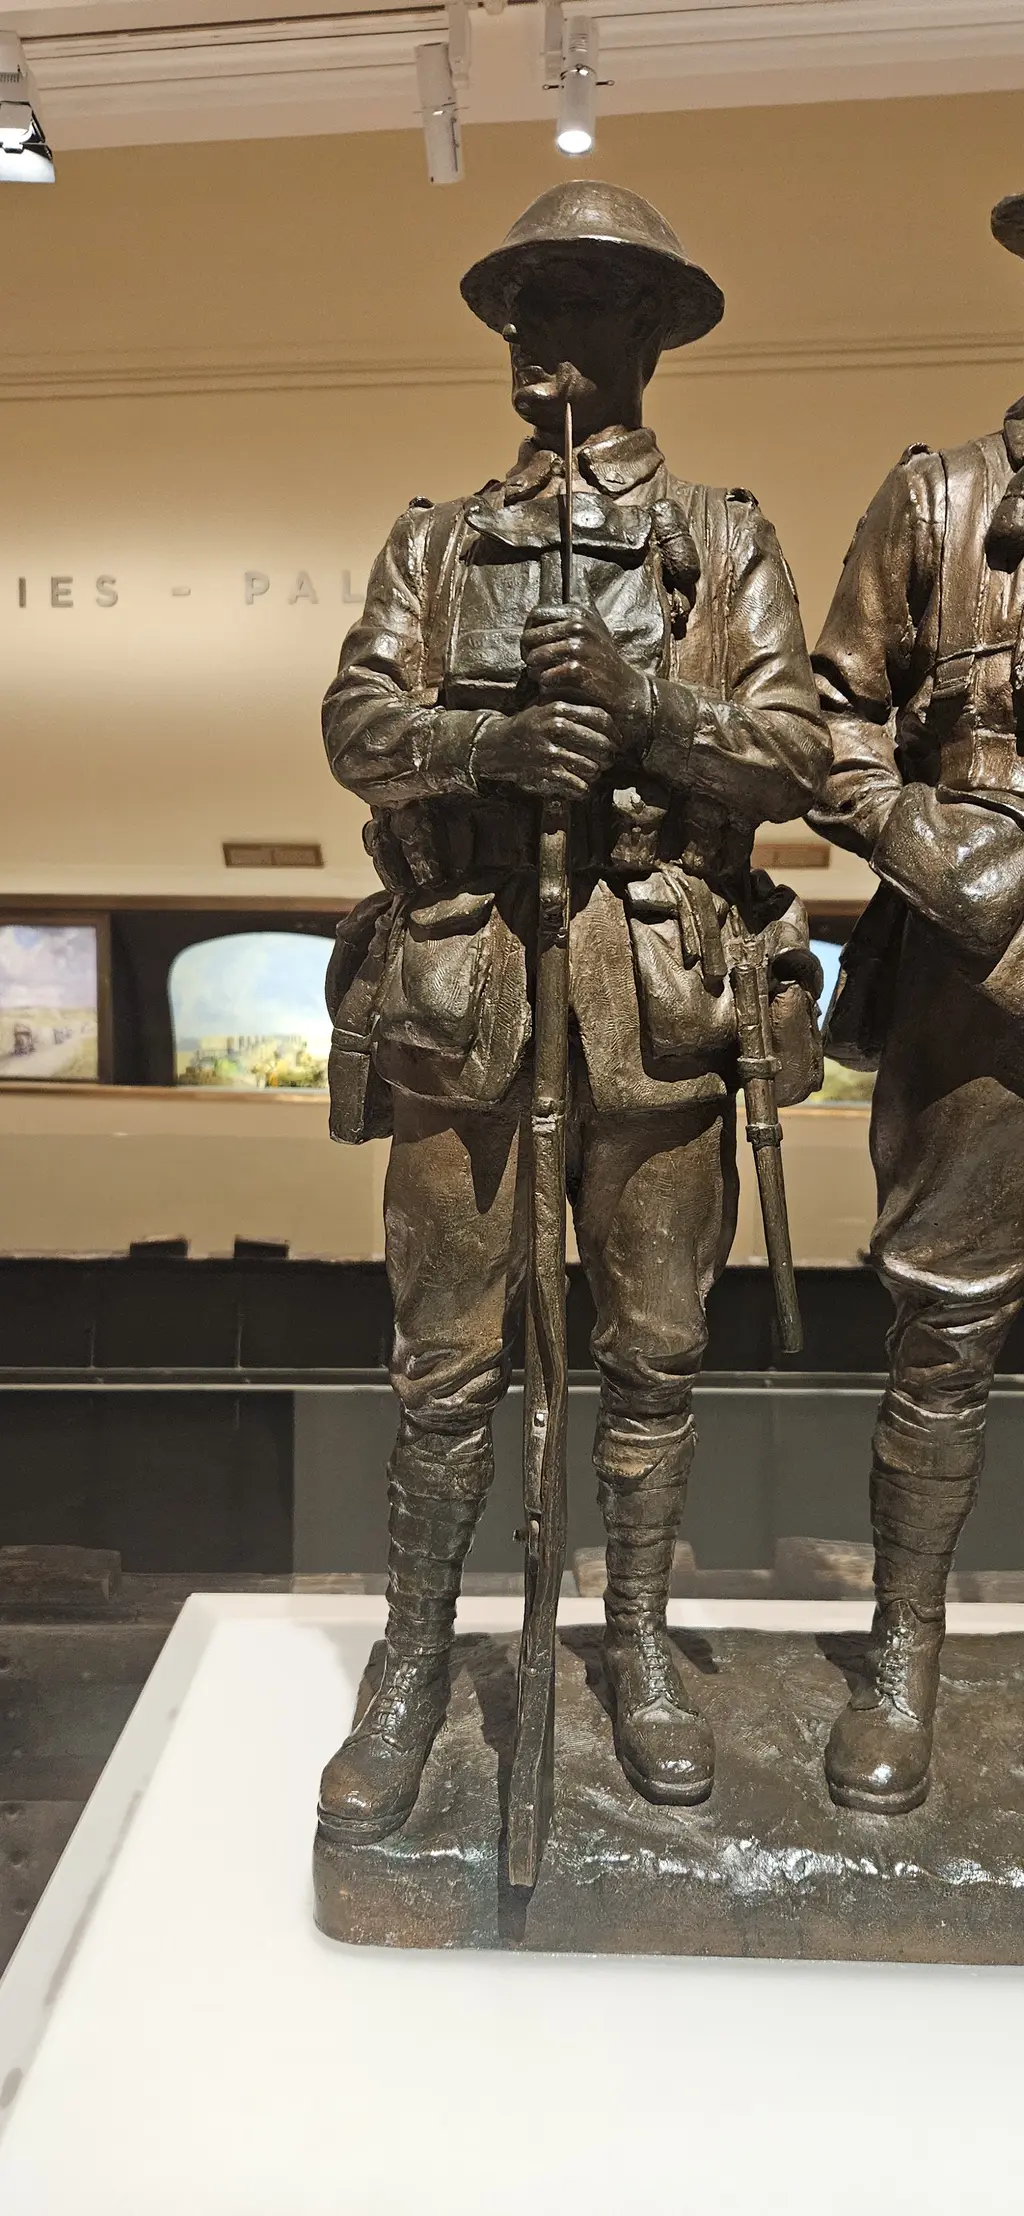
Zero Hour (8th August 1918)
First World War Australian Capital Territory
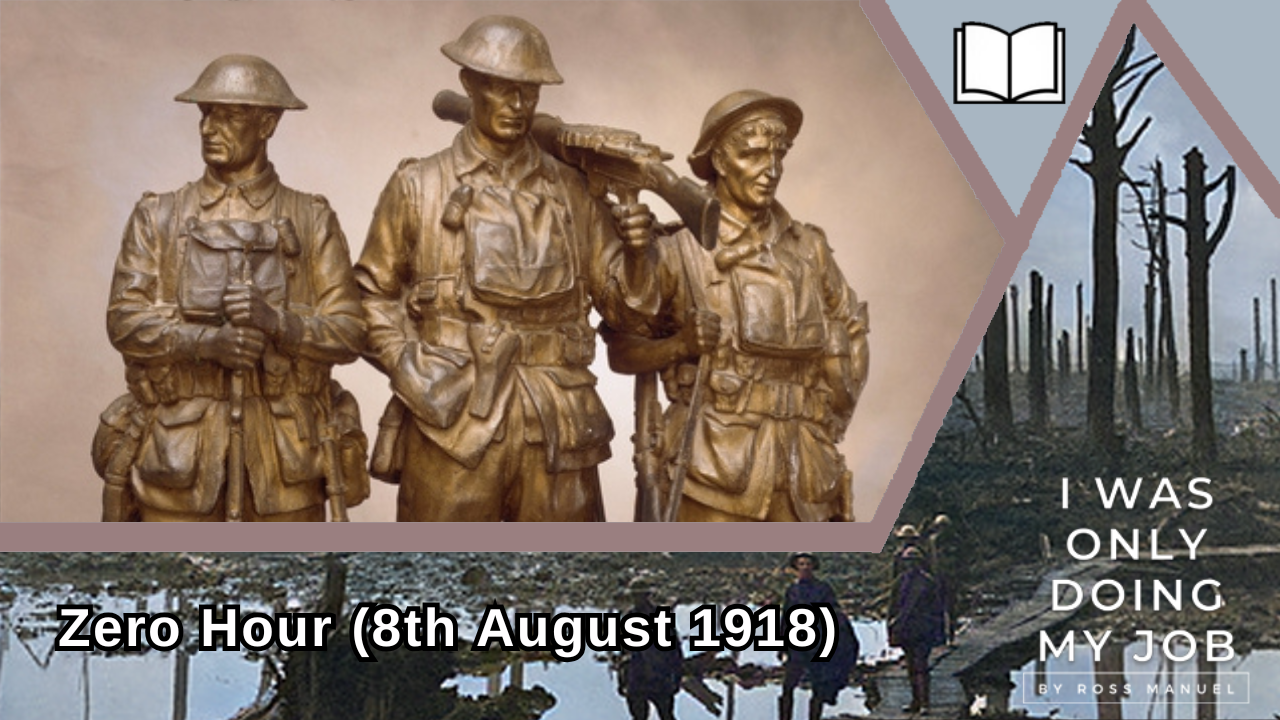
Zero Hour (8th August 1918)
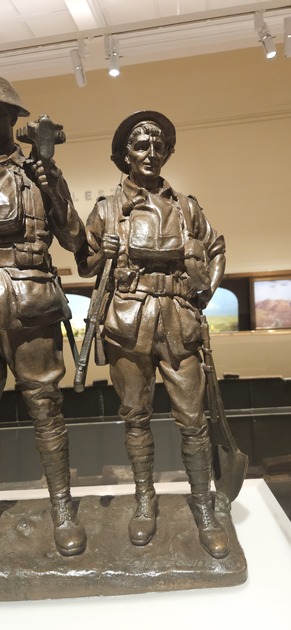
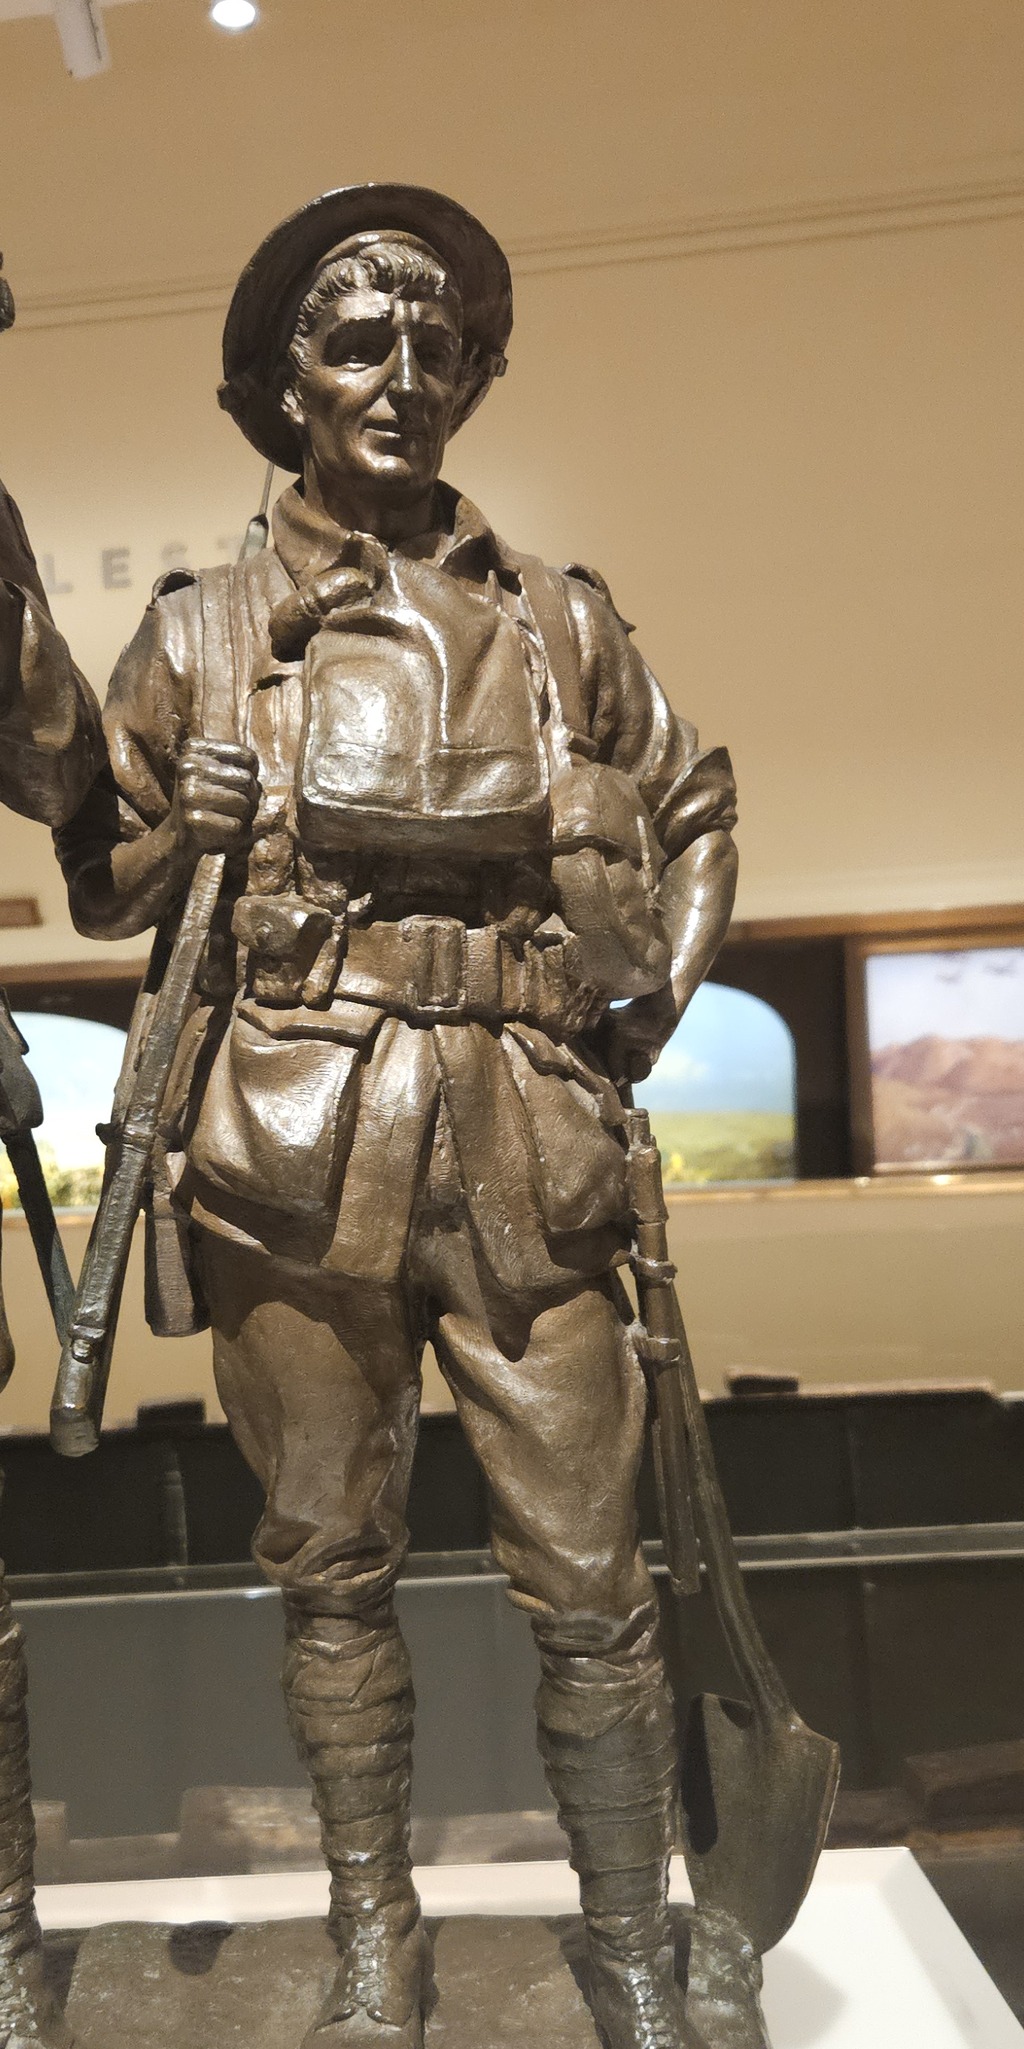
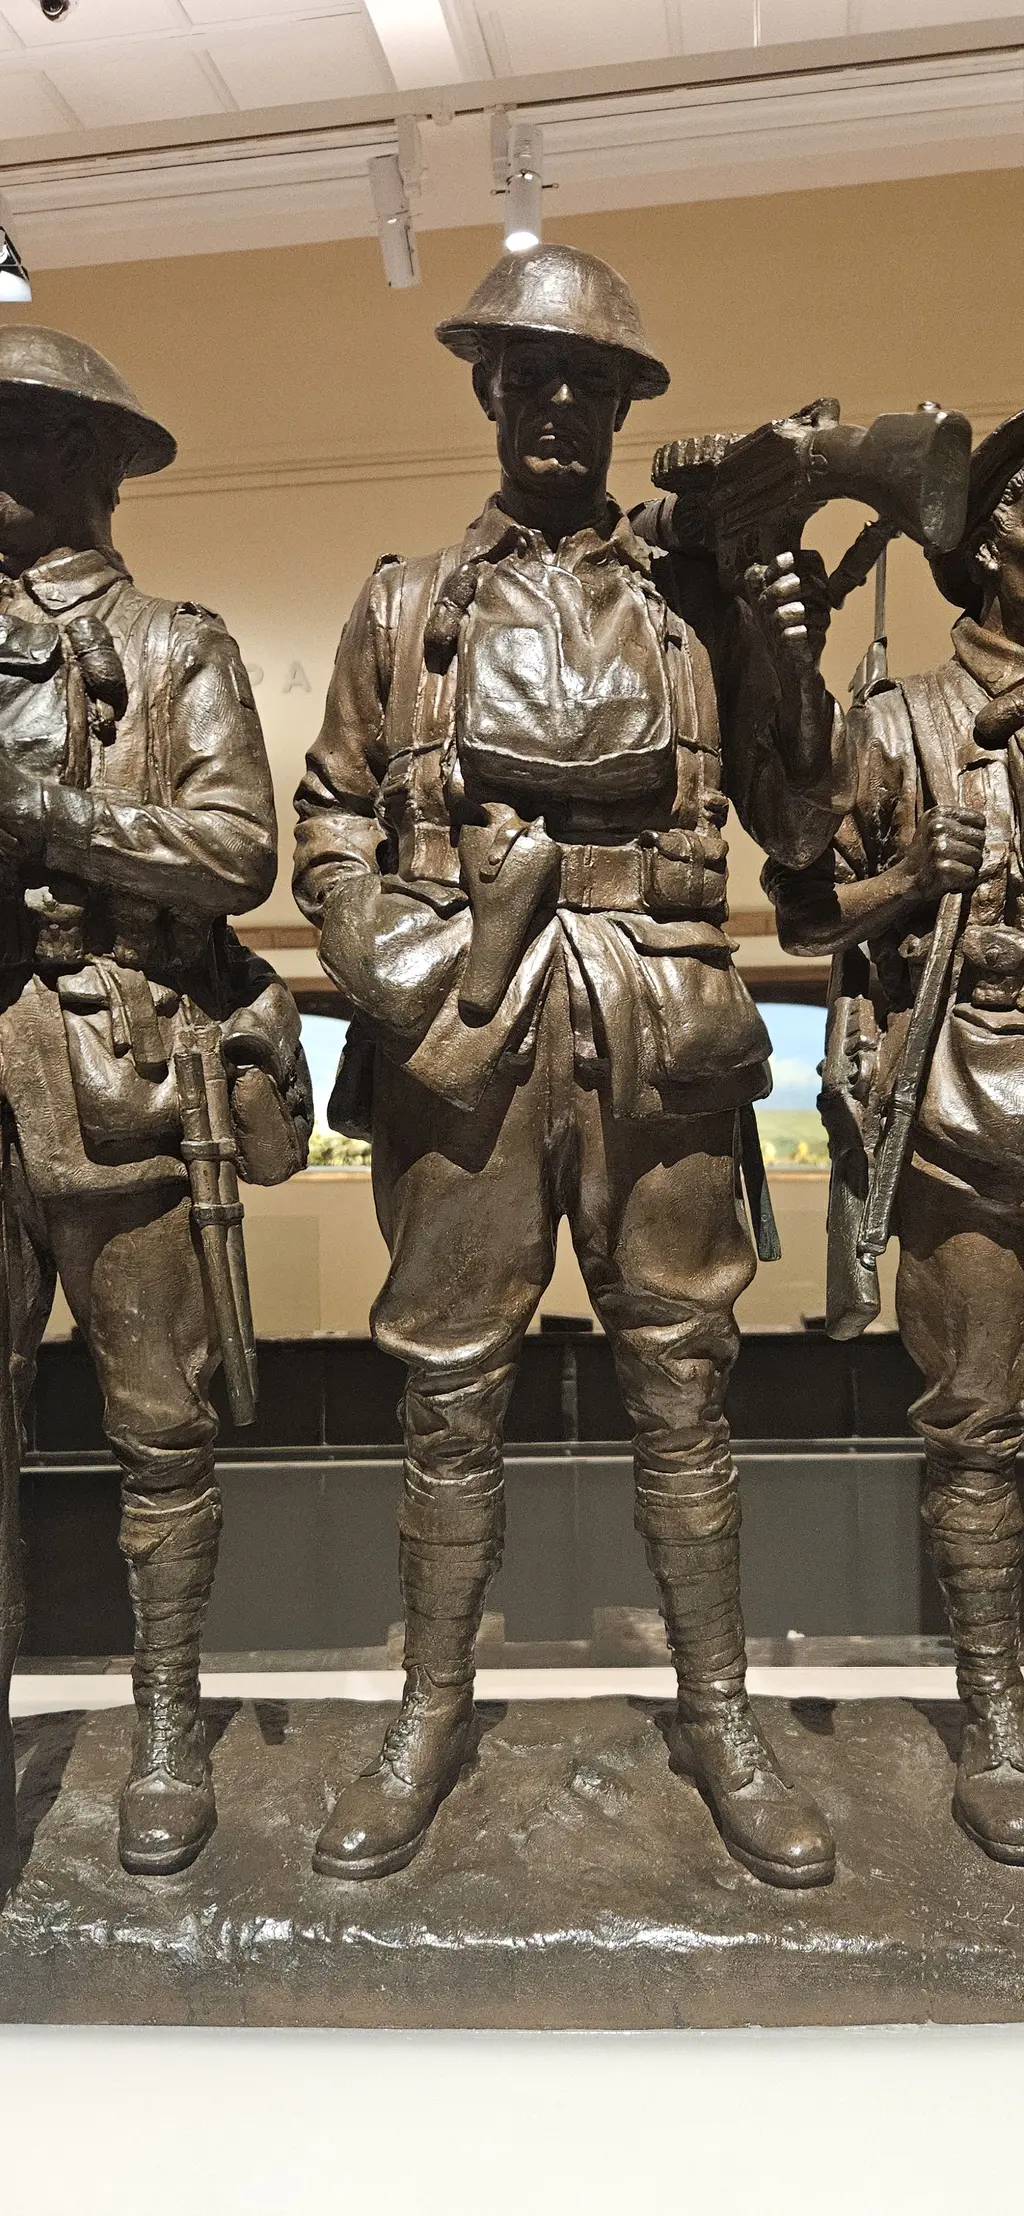
In the 1918 section of the Australian War Memorial’s First World War Gallery, on a plinth opposite the Mont-Saint Quinten diorama (One of the oldest dioramas in the Memorial’s collection) is my favourite piece of their expansive collection. It is not a weapon, medal or battlefield relic but a statue. It’s not a statue of a general or nationalistic symbol, but of three ordinary men, part of a larger Lewis gun team, but its more than just their depiction but what they represent that makes it my favourite.
I was first introduced to Zero Hour (8th August 1918) by Leslie Bowles while on one of my frequent visits to the Memorial by way of a voluntary guide, I overheard them talking about the statue while on their tour. On the surface, the statue is well sculpted depicting three visually different soldiers, and while the statue itself is rather ordinary, it’s the way the guide described it points its importance, as mentioned below.

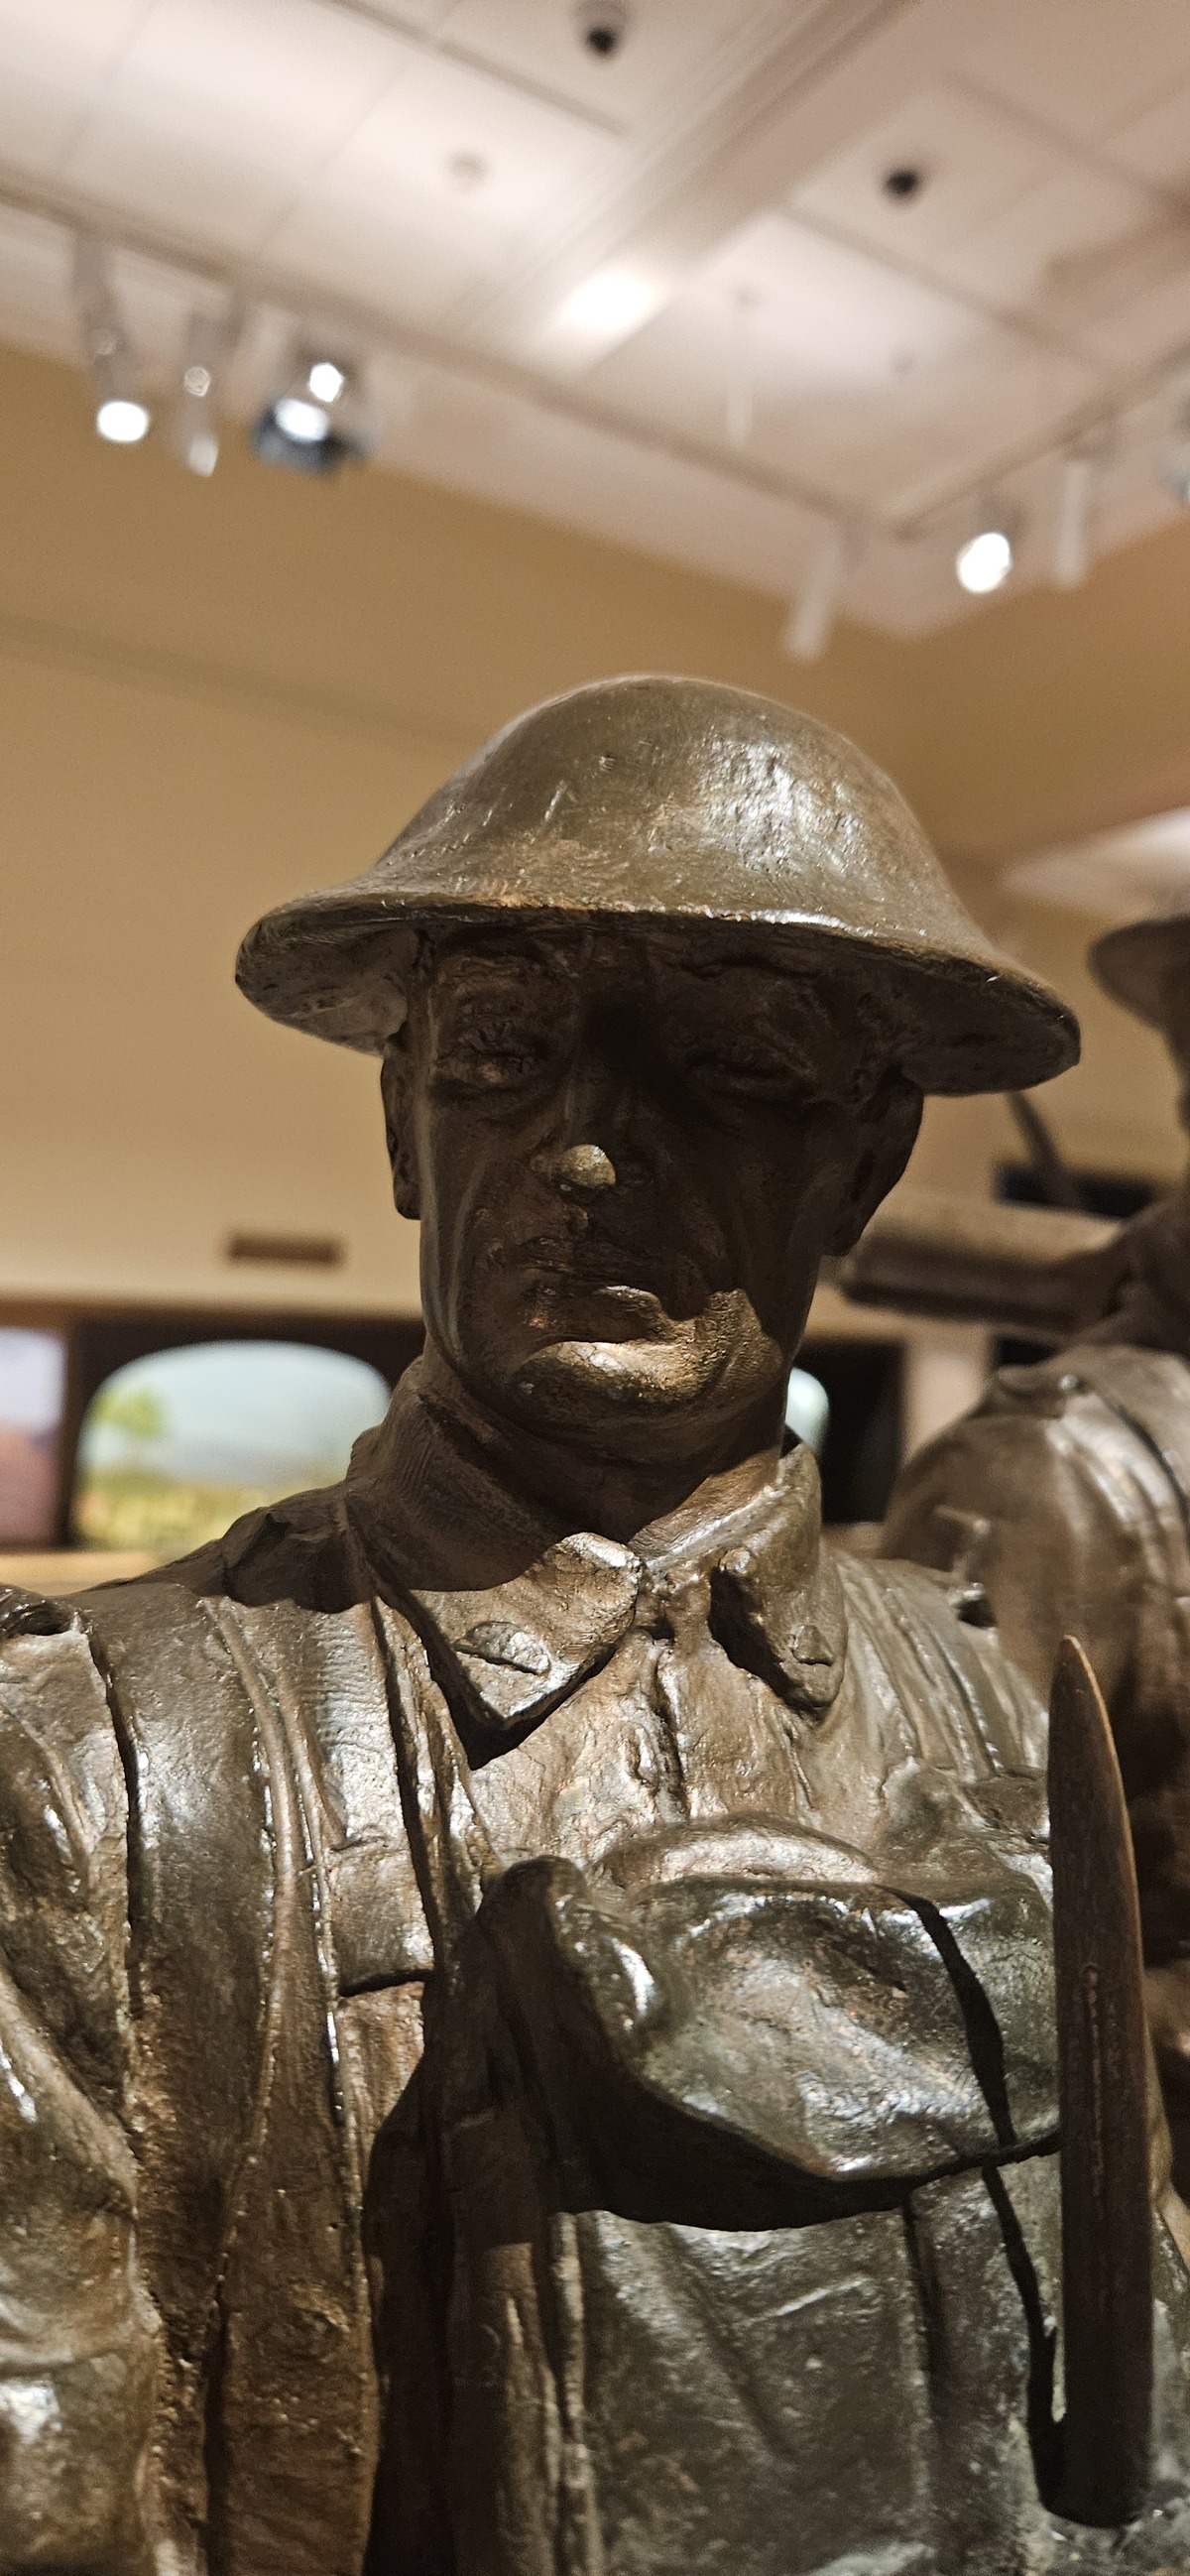
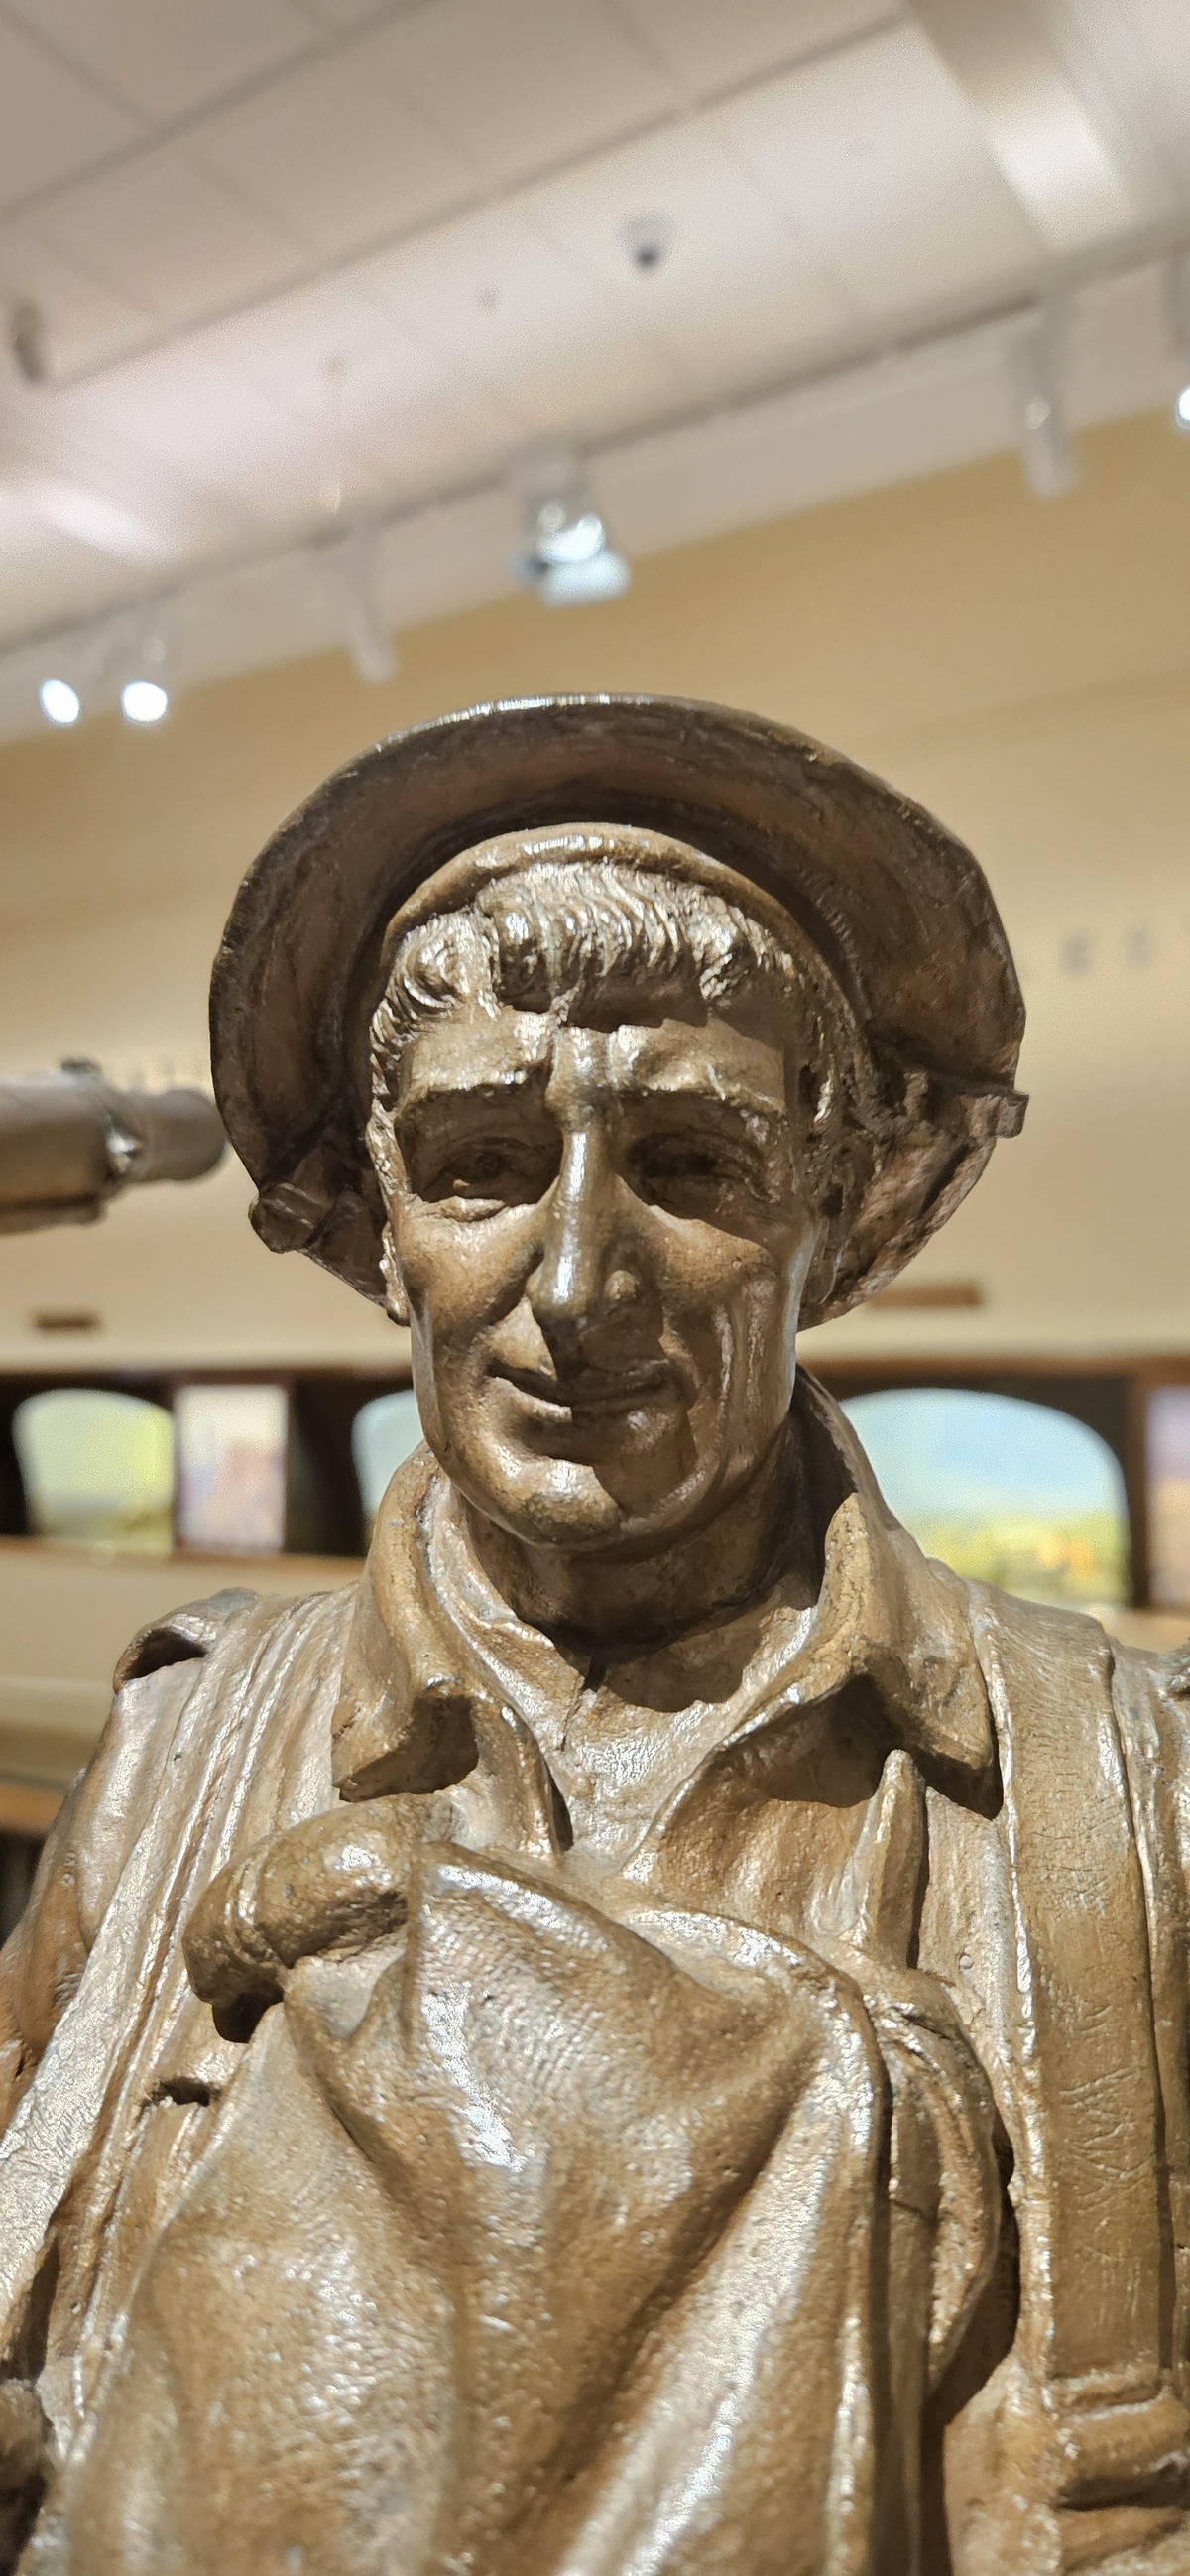
The Left Soldier
Standing to the left of the trio, he is standing sentry in a uniform and kit so immaculately presented as if straight from the pages of the Army Dress Regulations. Compared to the other two men, his bearing betrays his upbringing, he’s a public-school boy probably from Scotch College or Knox Grammar, most likely from the Militia or Permanent Forces and from means.
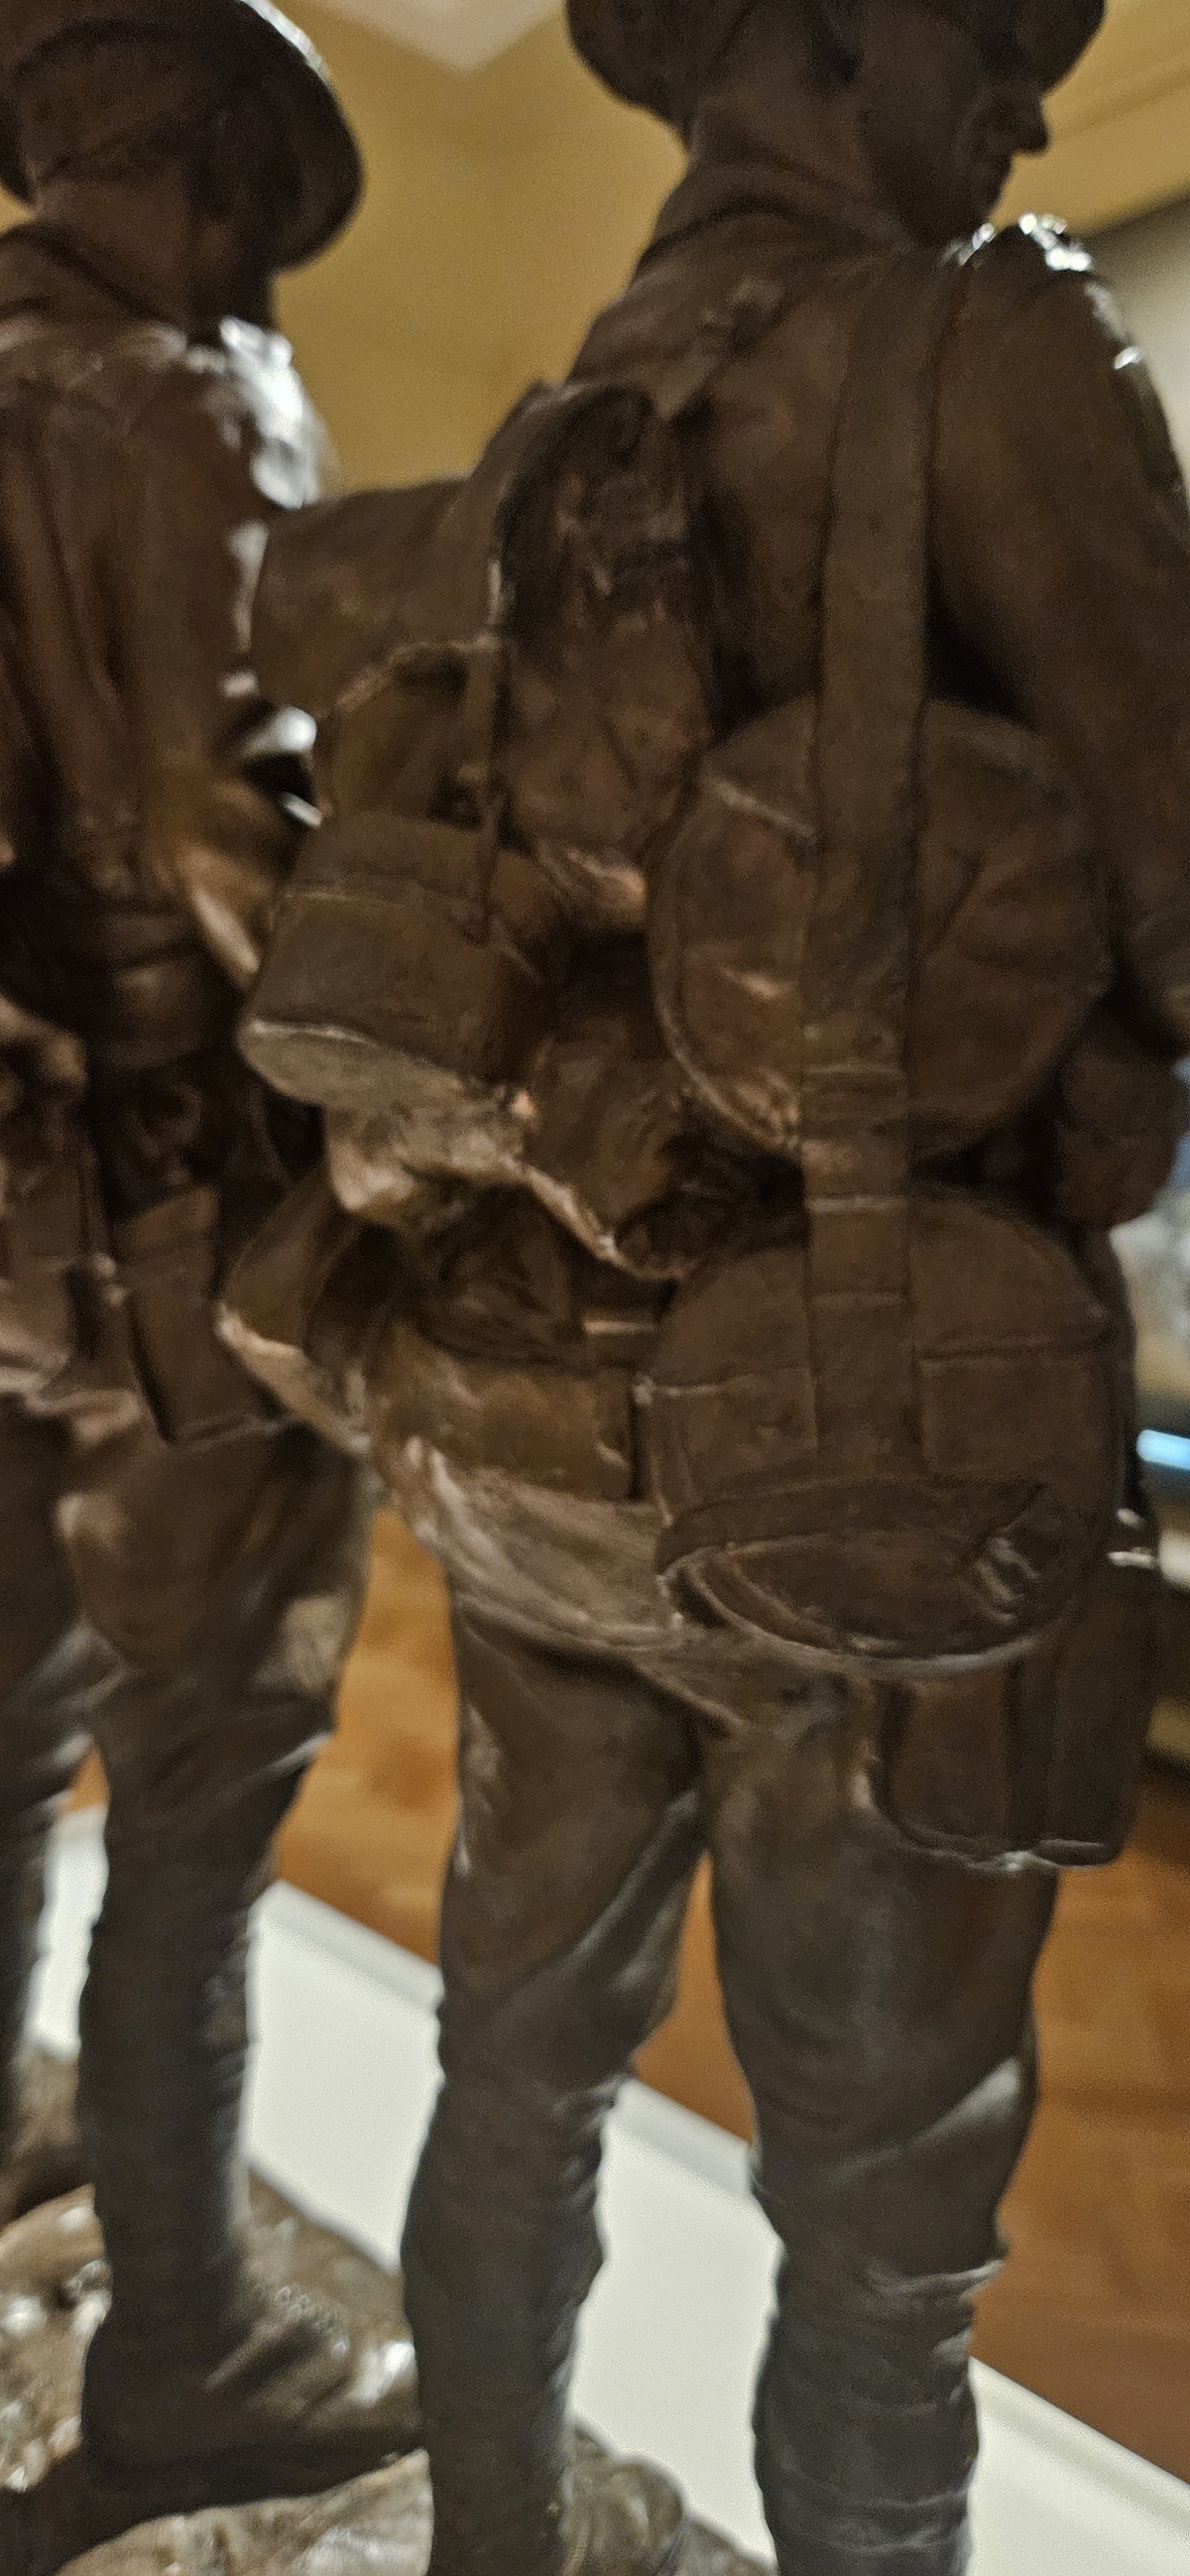

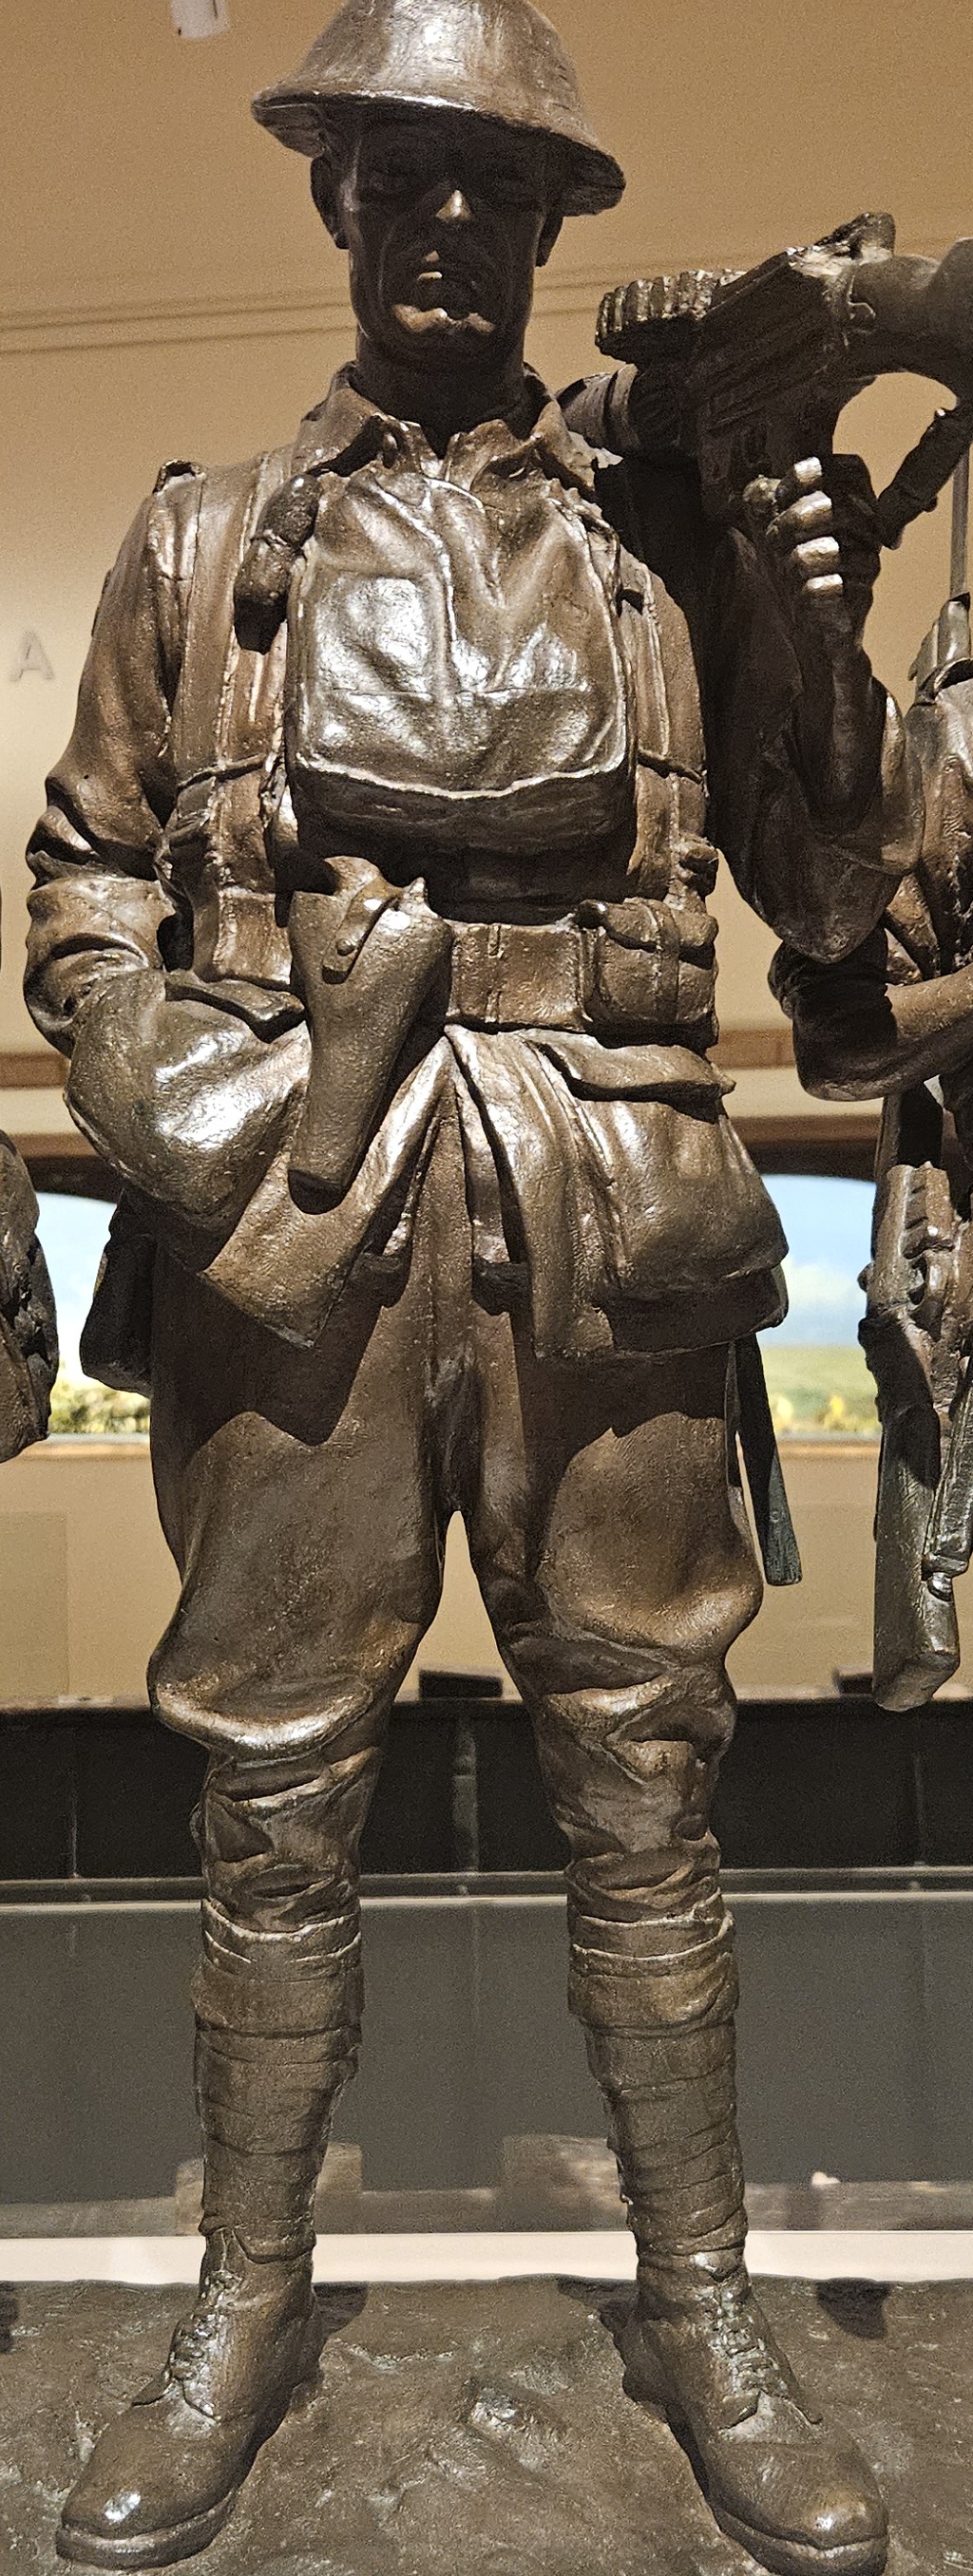


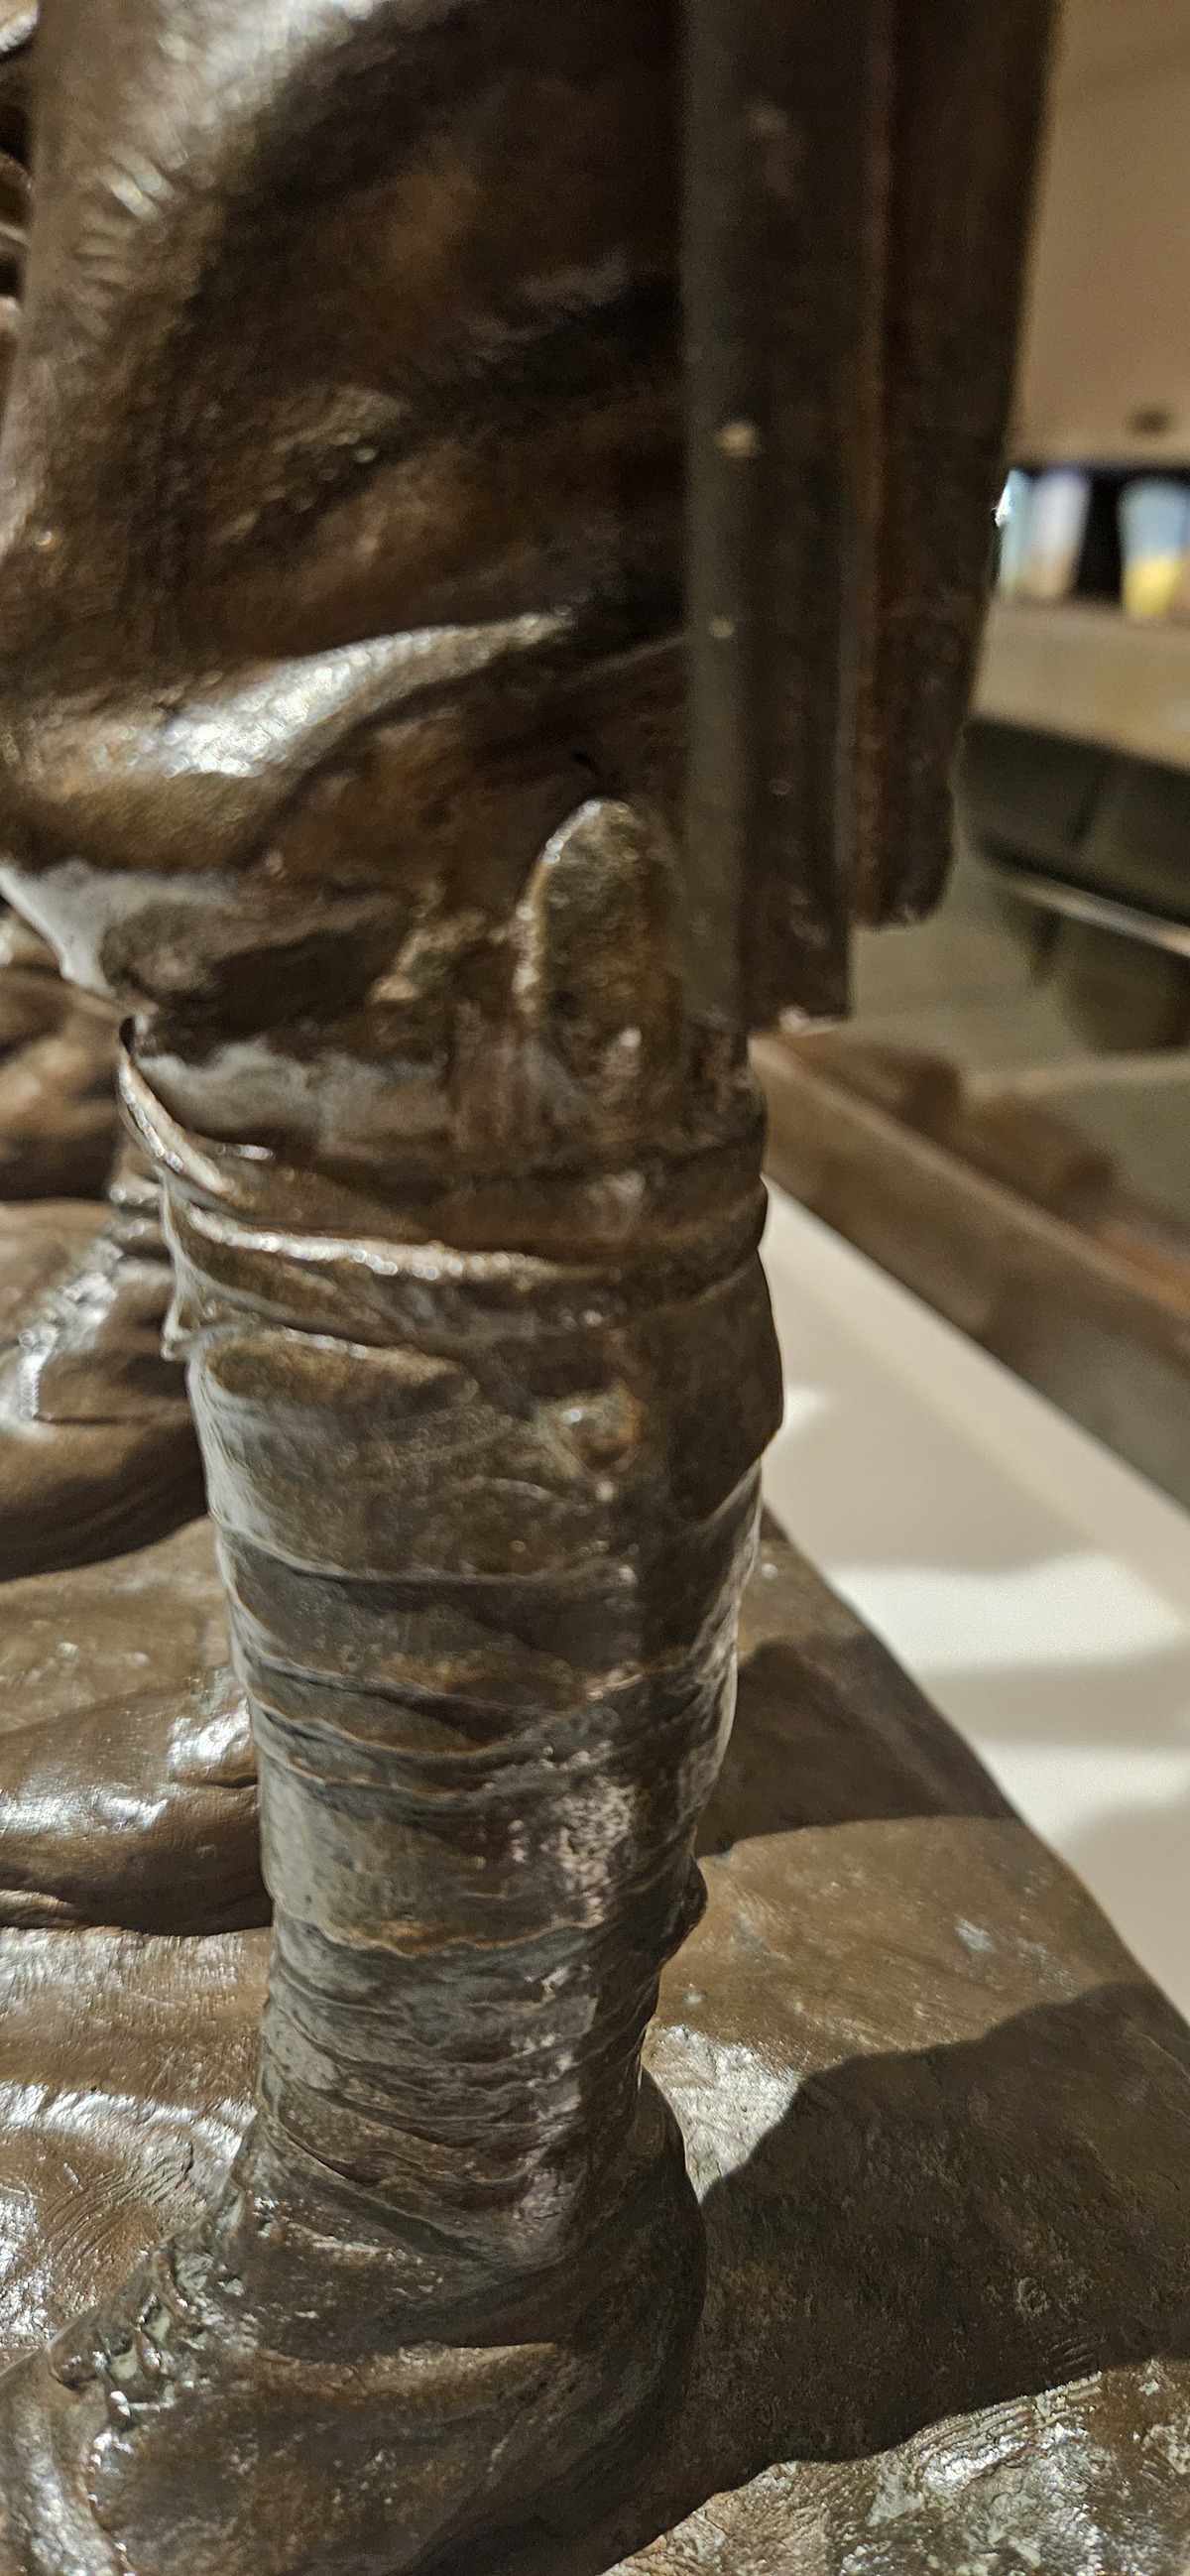
One of the things that the first and third soldiers have in common is that they are both carrying ammunition magazines for the Lewis Gun. First introduced at the start of the First World War, the Lewis Gun was innovative, it was man portable, air cooled and could be fired both from the bipod or from the hip, (though I have seen it fired from the shoulder as well) with a unique pan style magazine that allowed the ammunition to be easily carried by the six men per team.

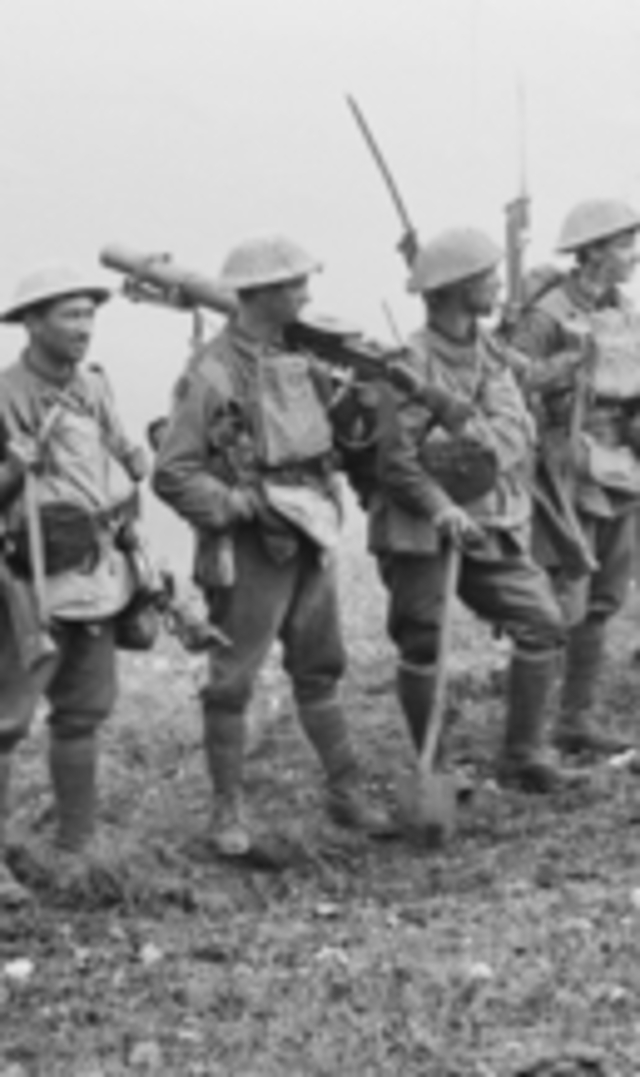
A Lewis Light Machine Gun
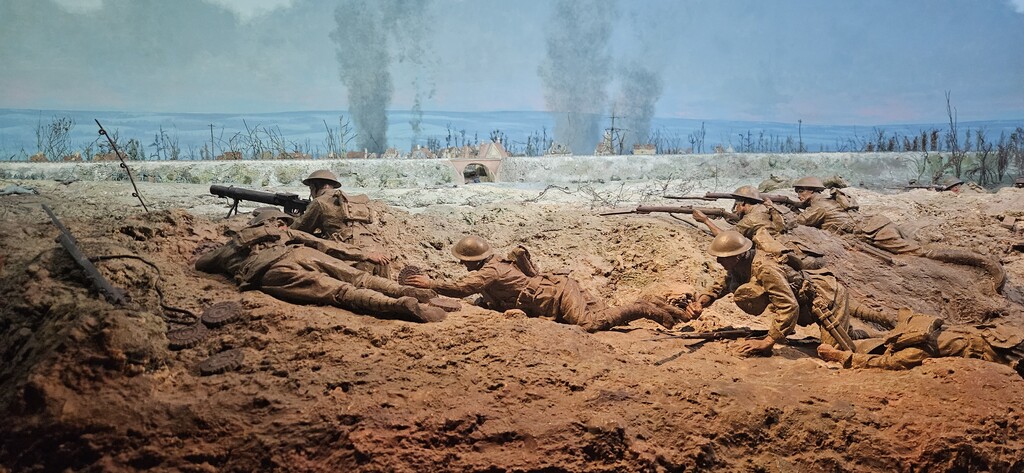
A Lewis Gun in Action (courtesy of the Dernancourt Diorama at the Australian War Memorial)
The first of these weapons made their way to the Australian Imperial Force in July 1915 and by 1918 they had become essential to the way Australian forces conducted themselves in the war. As enlistments fell and casualty lists grew, the Lewis Gun became the answer, firepower replacing men we no longer had to send forward. By the Battle of Amiens (where the 8th of August 1918 comes from) they had been integrated at the Company level and proved to be a strategic force multiplier the ancestor to the modern doctrine of fire and manoeuvre.
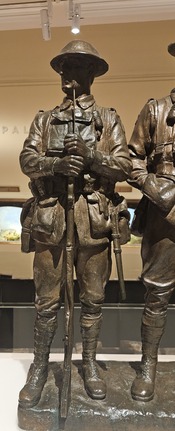
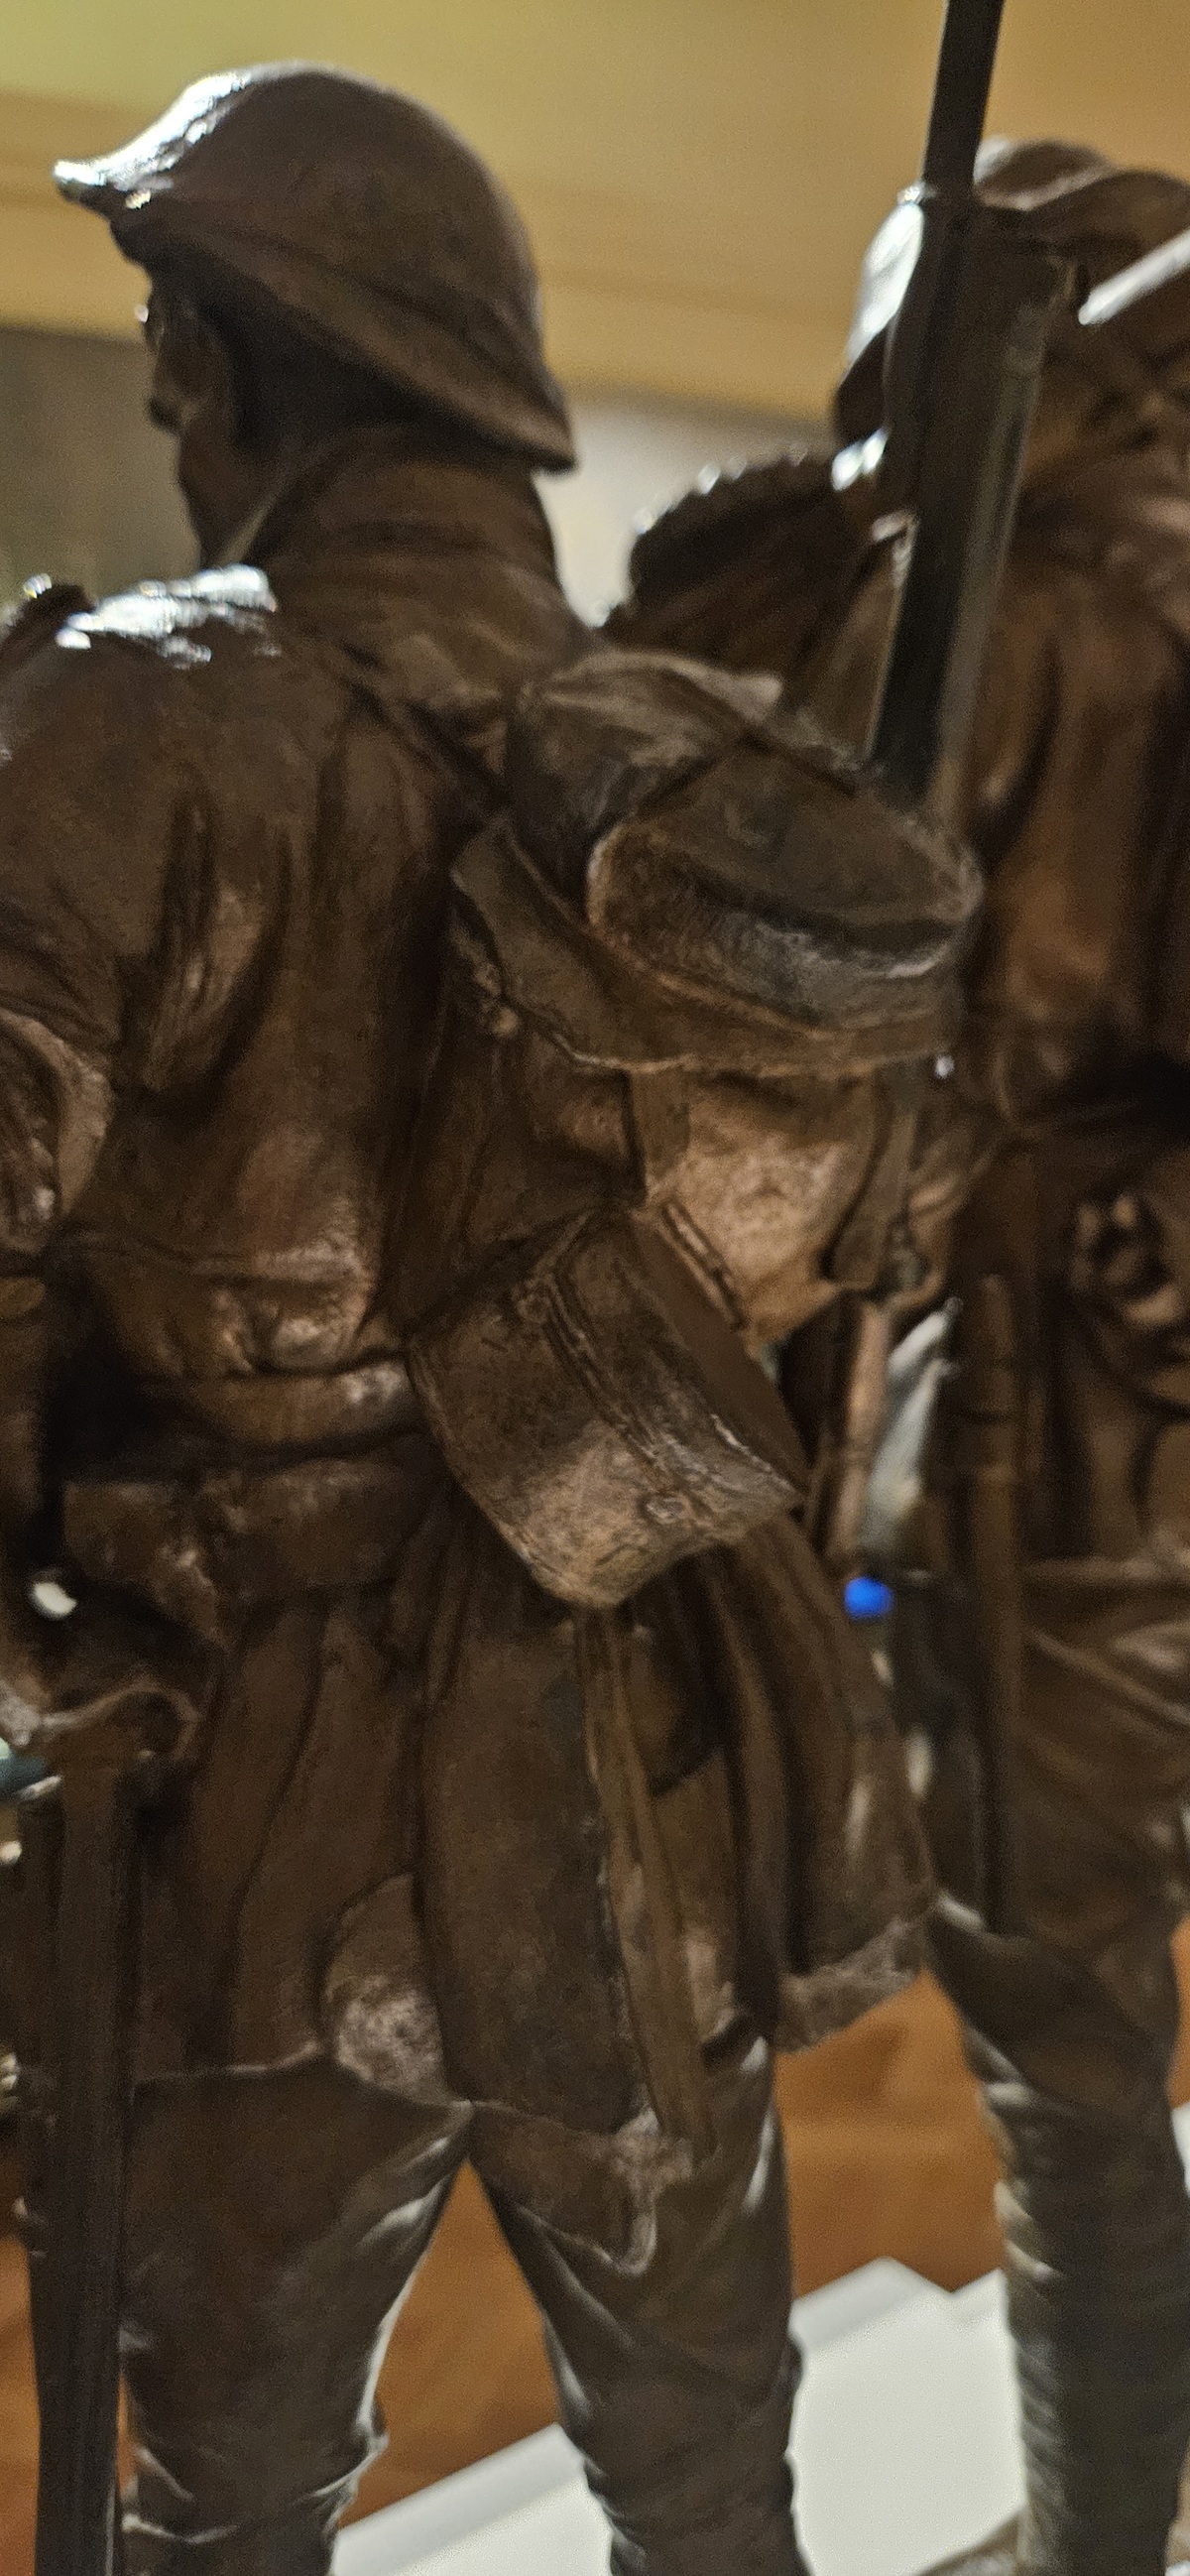
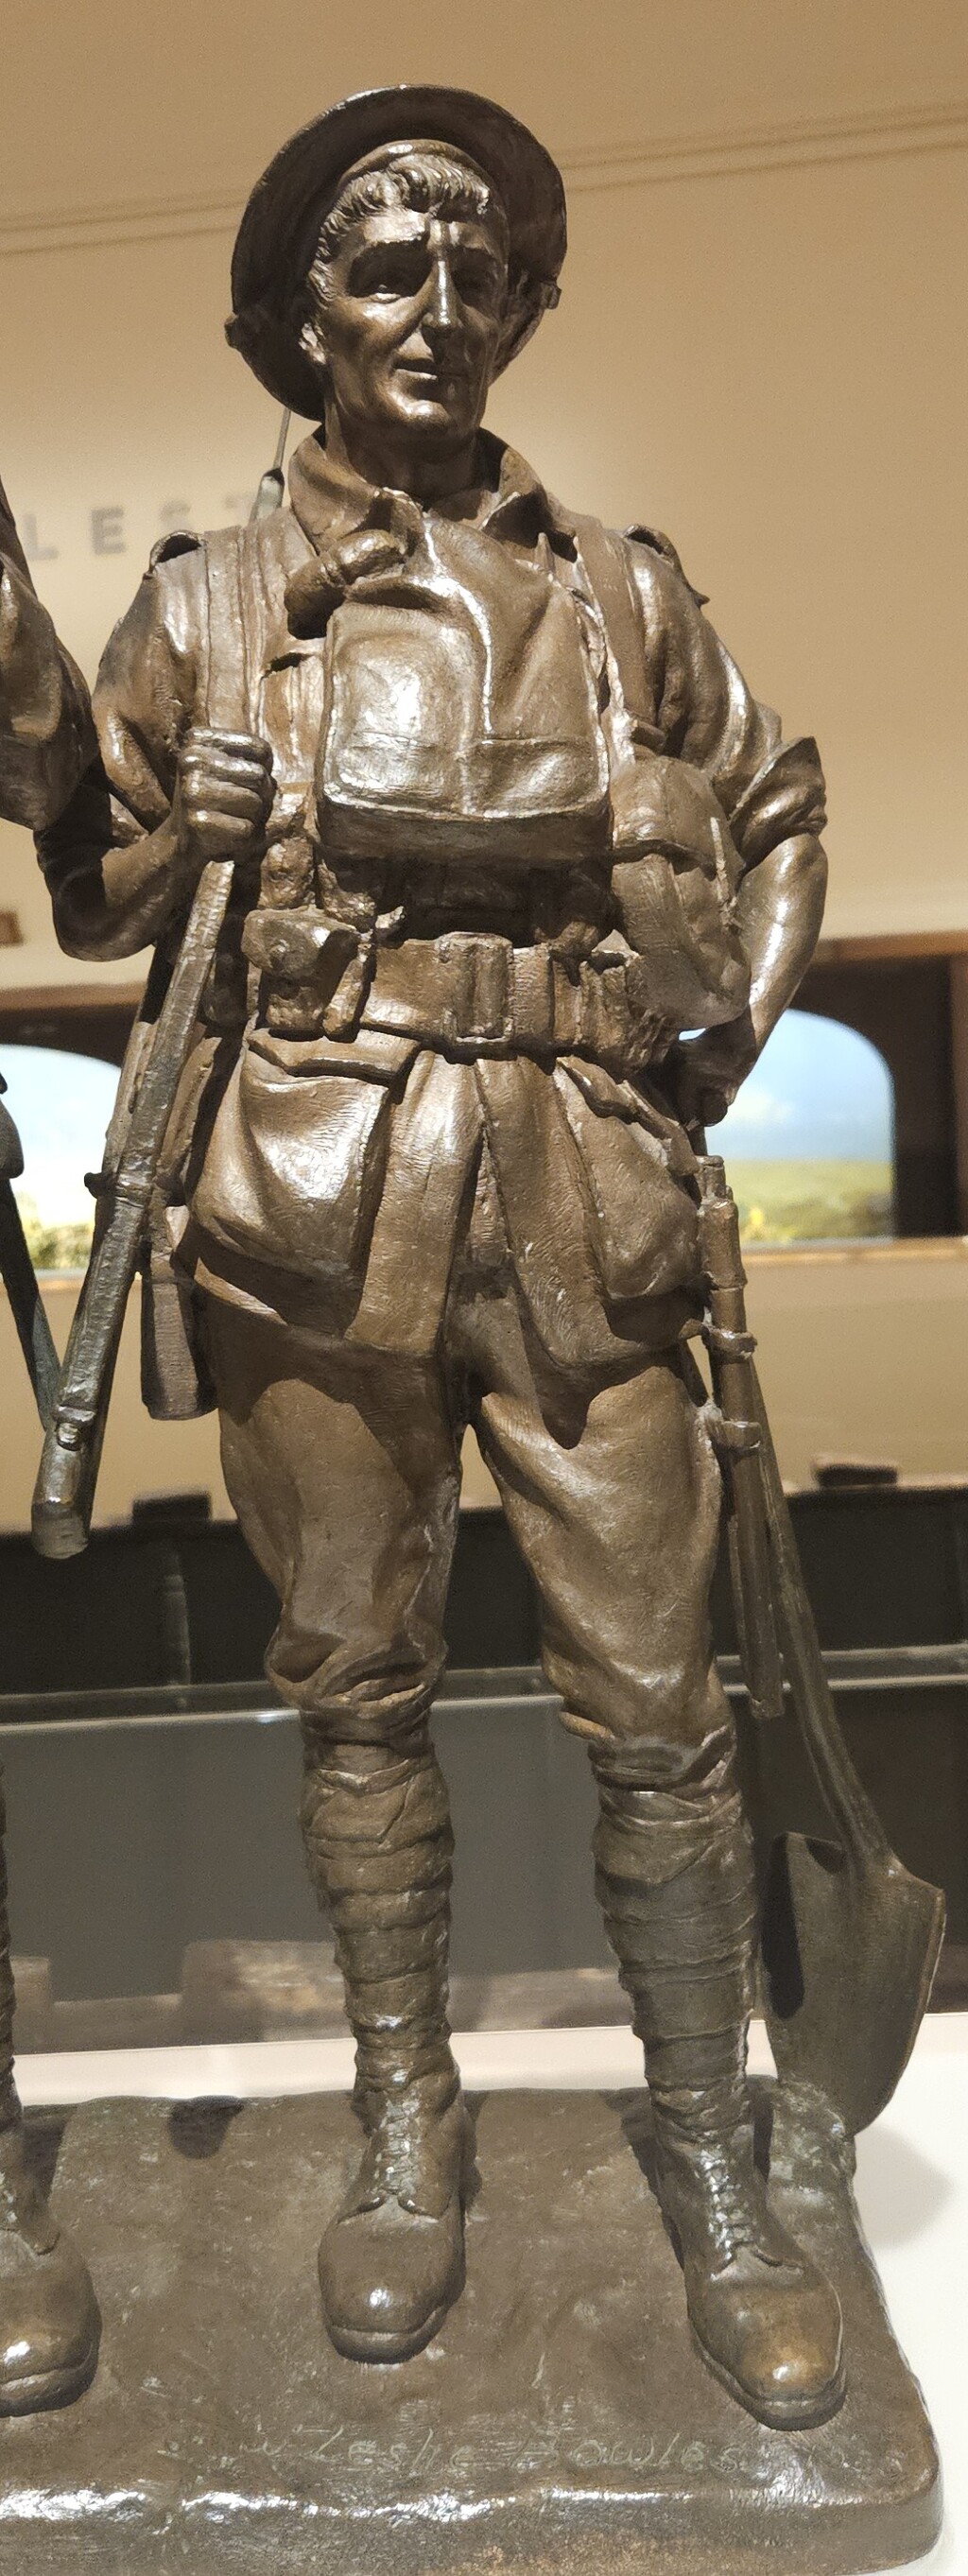
The team itself consisted of six men, with the primary operator being The First Lewis Gunner (Middle Soldier), he was strictly responsible for putting rounds down range, so his focus was on the iron sights on the weapon, the Second Gunner (Left Soldier) he carried spare parts for the weapon but also directed the Gunner on where the targets where. The rest of the team (amalgamated in Right Soldier) were ammunition carriers, they were responsible for carrying the pan-style drum magazines, keeping that gun supplied with .303 ammunition while also protecting the gunners with their own rifles.

What makes this remarkable is that these six men, as shown in the three depicted in Zero Hour, had to operate as one, regardless of background, belief, or bearing. The Lewis Gun team was only as effective as its weakest link; all six men were trained to operate, maintain, and fire the weapon, but they also had to trust one another. While Australia didn’t have the rigid class system of England, it certainly had its own divide between those with means and those without. Men who might never have operated in the same social circles in civilian life were now forced to rely on one another, bivouacking together, training together, sharing letters and parcels from home, going on leave together, and holding tight to one another when the shells began to fall. Whatever divisions existed before were stripped away in the mud and fire of the front line.
After the war, it’s easy to imagine the Ox and the Larrikin visiting the Brighton-le-Sands mansion of their Public School comrade, and being welcomed with the shirt off his back or a spare bed for the night.
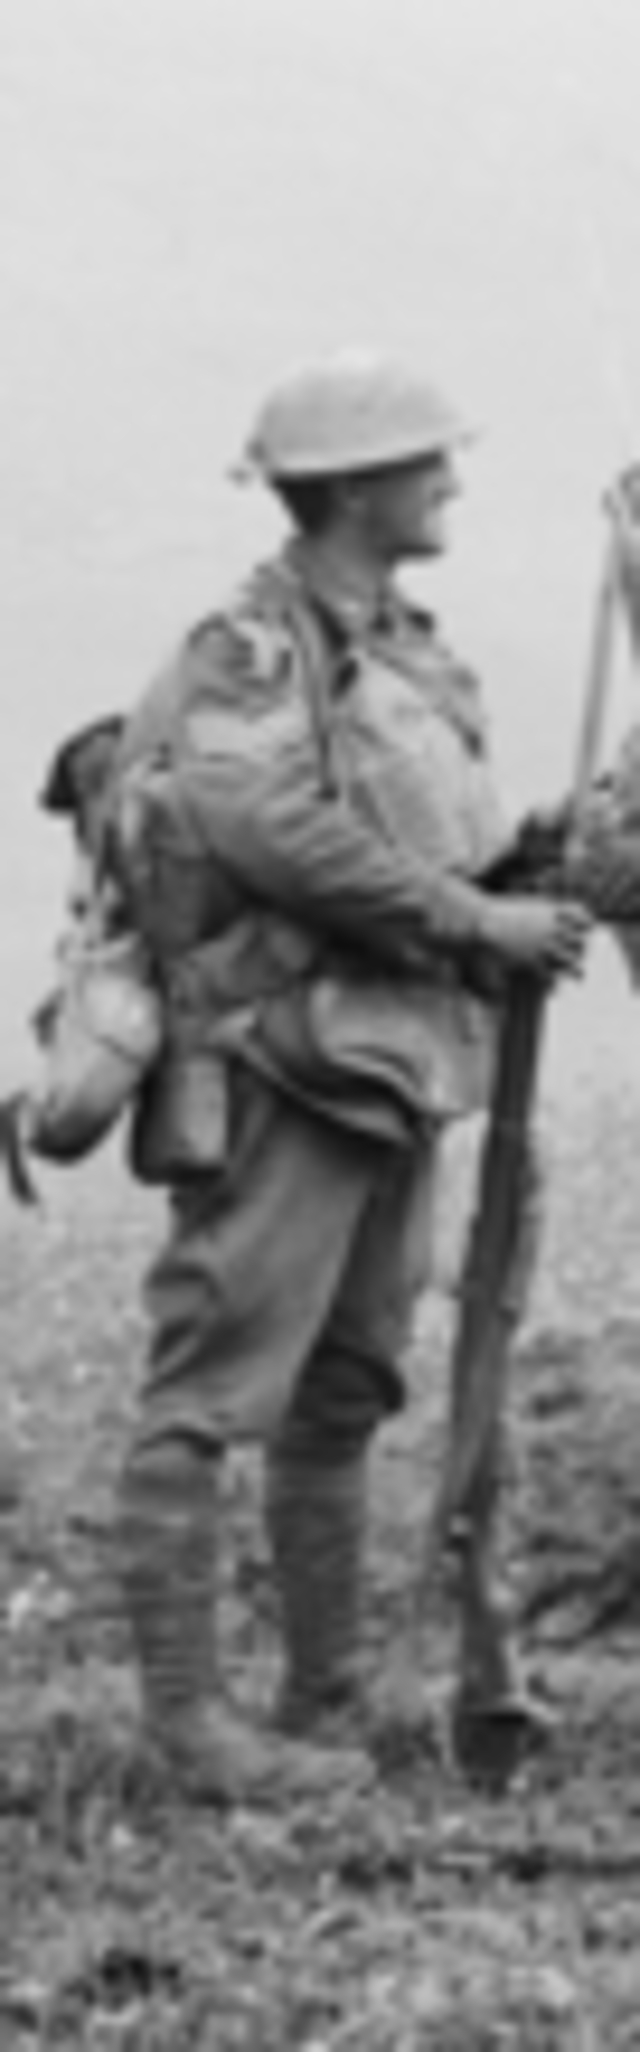
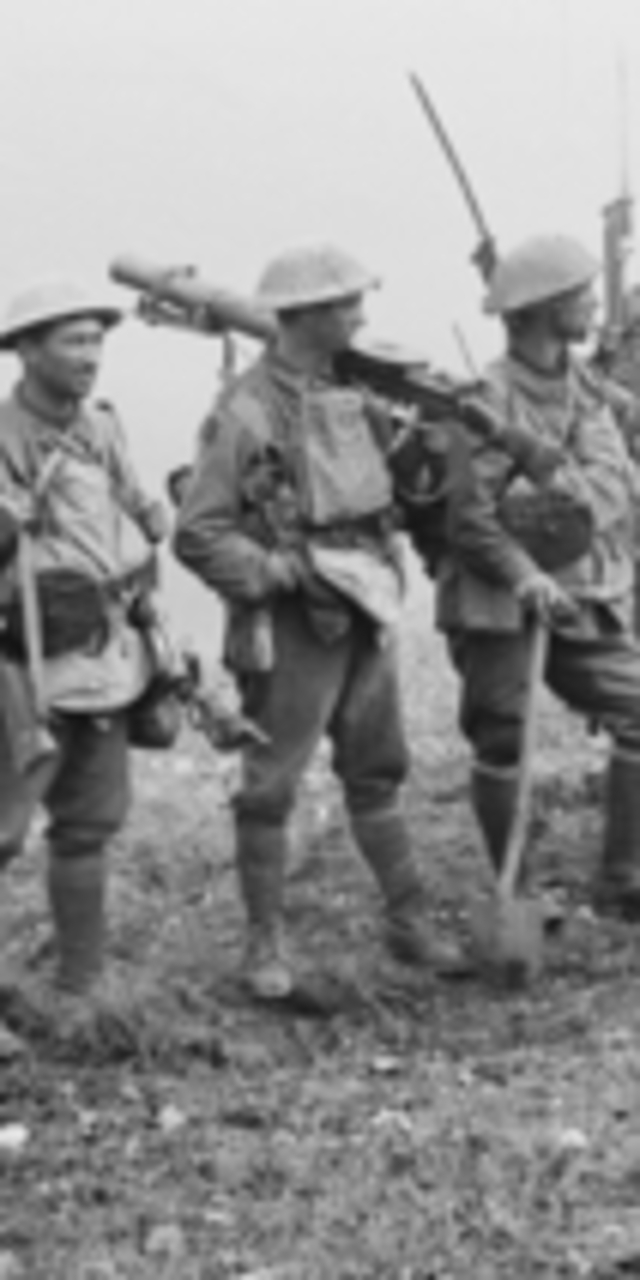
That is, of course, if allegories always followed the truth. While it’s never been expressly stated, there is compelling evidence that Bowles drew inspiration from a photograph taken of B Company 29th Battalion Australian Imperial Force during the Battle of Amiens, at Warfusee-Abancourt, France when he sculpted Zero Hour in 1935. This photo I know very well as episode thirteen is dedicated to the seventeen men depicted in the photo. This is especially clear when you look at the first, third, four and seventh soldiers in the photograph; their stance, uniform and weapons when compared to Zero Hour.
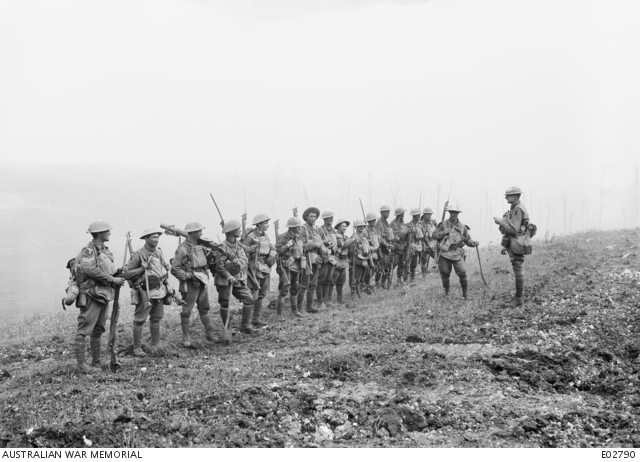
B Company 29th Australian Infantry Battalion at Warfusee-Abancourt
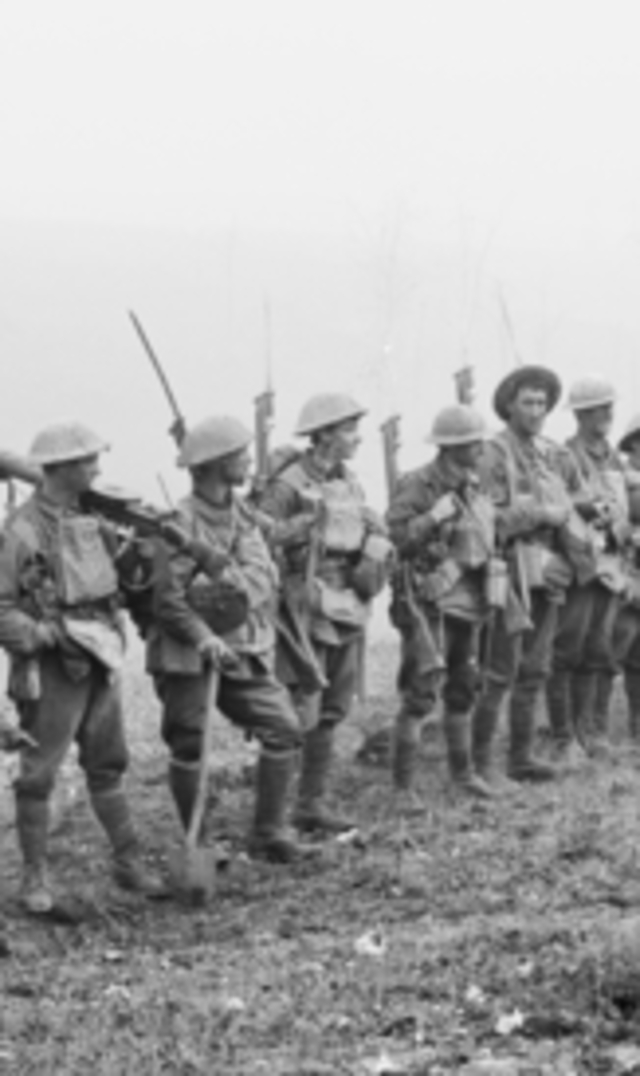
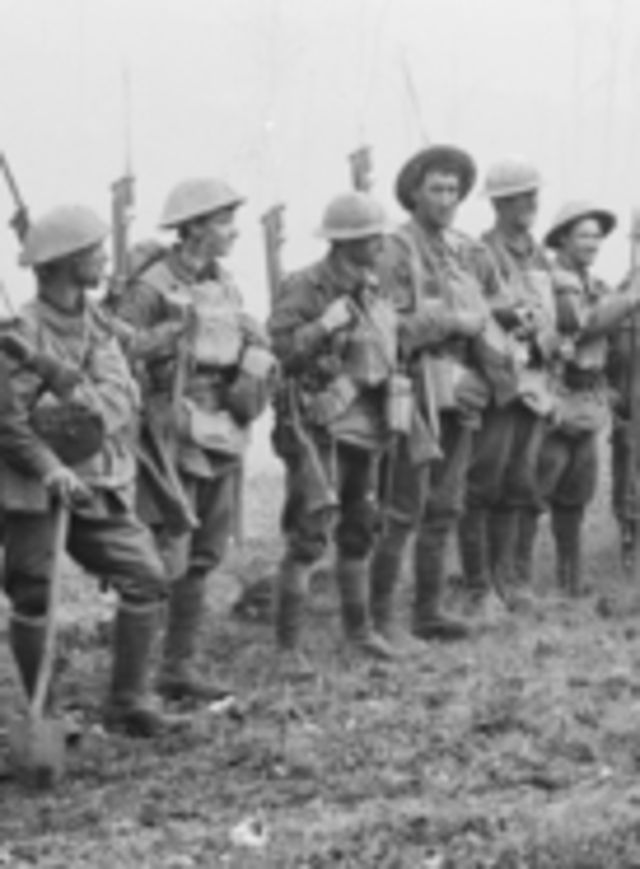
It would not be until 1998 that the true identities of the men depicted in the photograph of B Company 29th Australian Infantry Battalion, nearly sixty years after Leslie Bowles made Zero Hour (8th August 1918), the sculptures message remains timeless. Amid the mud and fire of the front, these men forged a society where reliance, trust and equality mattered above all, a society they bled for, and it falls to us to take up that mantle to continue to fight until those ideals are realised.